Monday, August 29, 2016

Masonable Mondays #5 - Snickerdoodle Hummus

Welcome to Masonable Mondays #5! Today I made a salty, sweet and healthy Snickerdoodle Hummus Masonable. I have been making this snickerdoodle hummus for years. It is amazing! It tastes and smells just like snickerdoodle cookies! The secret is cinnamon and almond butter instead of tahini. I made my own almond butter this weekend. I used my Almond Toffee Butter recipe and just omitted the toffee pieces. But you can use store bought, I know I have many many times. Even some of the friends I shared the recipe with used peanut butter and said it was delicious. If you haven't tried a sweet hummus this should definitely be the one you try. It is so good with sliced apples and carrots. The carrots will remind you of glazed carrots. I really like the salty pretzel crackers with it too. It has that salty sweet thing going for it. The #Masonable is the perfect container to pack all these yummy companions into a easy to carry snack or dessert. It is just sweet enough to satisfy your sweet tooth. So grab a mason jar and a fruit cup and get prepping.


Snickerdoodle Hummus Masonable
Serves 1

Supplies

1 wide mouth pint Mason jar
2 empty fruit cups

Ingredients

Carrot sticks
Apple slices*
Snickerdoodle Hummus (recipe below)
Pretzel chips or crackers

Directions

Add carrots and apples to the bottom of the mason jar. Add fruit cup and place hummus in cup. Add lid and stack pretzels on top of lid. Top with inverted fruit cup and secure with mason jar ring. Store in refrigerator until ready to eat.

*Note: To prevent apple slices from turning brown toss in lemon juice before adding to the jar.


Snickerdoodle Hummus
Makes about 1-1/2 cups; 12 – 2 Tbsp servings

Ingredients

1 (15 oz) can low sodium garbanzo beans
2 Tbsp. almond butter
2 Tbsp. maple syrup
1 Tbsp. brown sugar
1/2 tsp. cinnamon, ground

Directions

Drain garbanzo beans reserving liquid. Place garbanzo beans in a food processor along with almond butter, maple syrup, brown sugar, and cinnamon. Pulse for about 1 minute until all ingredients are thoroughly combined. Slowly drizzle in reserved liquid (you will not need all of it, approx. 1/3 cup) until the dip is smooth and desired consistency. Transfer to a bowl and store in the refrigerator until ready to serve.

To serve try garnishing with a sprinkle of cinnamon and a drizzle of maple syrup. Surround hummus with apple slices, carrots and/or pretzel crackers.

Nutritional Info per Serving: Calories 71.8; Total Fat 2.0 g; Saturated Fat 0.2 g; Polyunsaturated Fat 0.5 g; Monounsaturated Fat 1.1 g; Cholesterol 0.0 mg; Sodium 105.7 mg; Potassium 91.7 mg; Total Carbohydrate 12.3 g; Dietary Fiber 1.7 g; Sugars 3.5 g; Protein 2.1 g


Linking to:
Tumbleweed Contessa - What'd You Do This Weekend?

Wednesday, August 24, 2016

Instant Pot Spicy Beef Vegetable Soup

I have made this Spicy Beef Vegetable Soup sooooo many times. Too many to count in fact. At one point I would make it just about once a week. It is so easy to throw together. I usually make it on the stove. Well let me tell you it just got faster to make too! I made it in the instant pot tonight and it was so easy and super fast. And, and, it did not heat up the kitchen! I didn't have to stir anything. I just waited for the beep and did a quick release. Delicious and very simple! Taste like it cook for a long time, all the flavors were perfectly blended. I can't wait to enjoy the leftovers, they make a great lunch.

You can play around with the ingredients too. I can't tell you how many of my soup recipes start as a variation of this one soup. My Stuffed Zucchini SoupMoussaka Soup and Barbecue Pork and Vegetable Soup all started as a variation of this recipe. I look forward to adapting some of them to the pressure cooker one day too. I hope this recipe will inspire you to make some soup in your pressure cooker soon.


Instant Pot Spicy Beef Vegetable Soup
Makes 6 to 8 servings

Ingredients

1 lb. lean ground beef
1 cup chopped onion
27 oz. spaghetti sauce
3 1/2 cups water
16 oz. frozen mixed veggies
10 oz. diced tomatoes and green chilies, undrained
1 cup sliced celery
1 tsp. beef bouillon
1 bay leaf
Kosher salt and black pepper, to taste

Directions

Place Instant Pot on saute, drizzle with a little olive oil add beef and onion. Brown stirring occasionally, season beef and onion mixture with salt and black pepper. Add remaining ingredients and set to cook at high pressure for 4 minutes. When cooking cycle is complete let sit 1 minute and perform a quick release. Remove bay leaf and serve.

For Crockpot and Stovetop directions [Click Here].

For a Low Sodium version make the following substitutions: Low sodium pasta sauce, no salt added Rotel tomatoes and use 3-1/2 cups unsalted beef stock for water and bouillon.


Instant Pot “Sake” Special Ramen

Last Wednesday was an unusual day for me. I guess I was feeling adventurous? First I did something different with my hair when I went to the salon. Then I went to our sushi restaurant (Sake Sushi) and did not order sushi. I always get sushi? But this time, I got ramen off of the daily specials. It was a first for me. I have never had real proper 
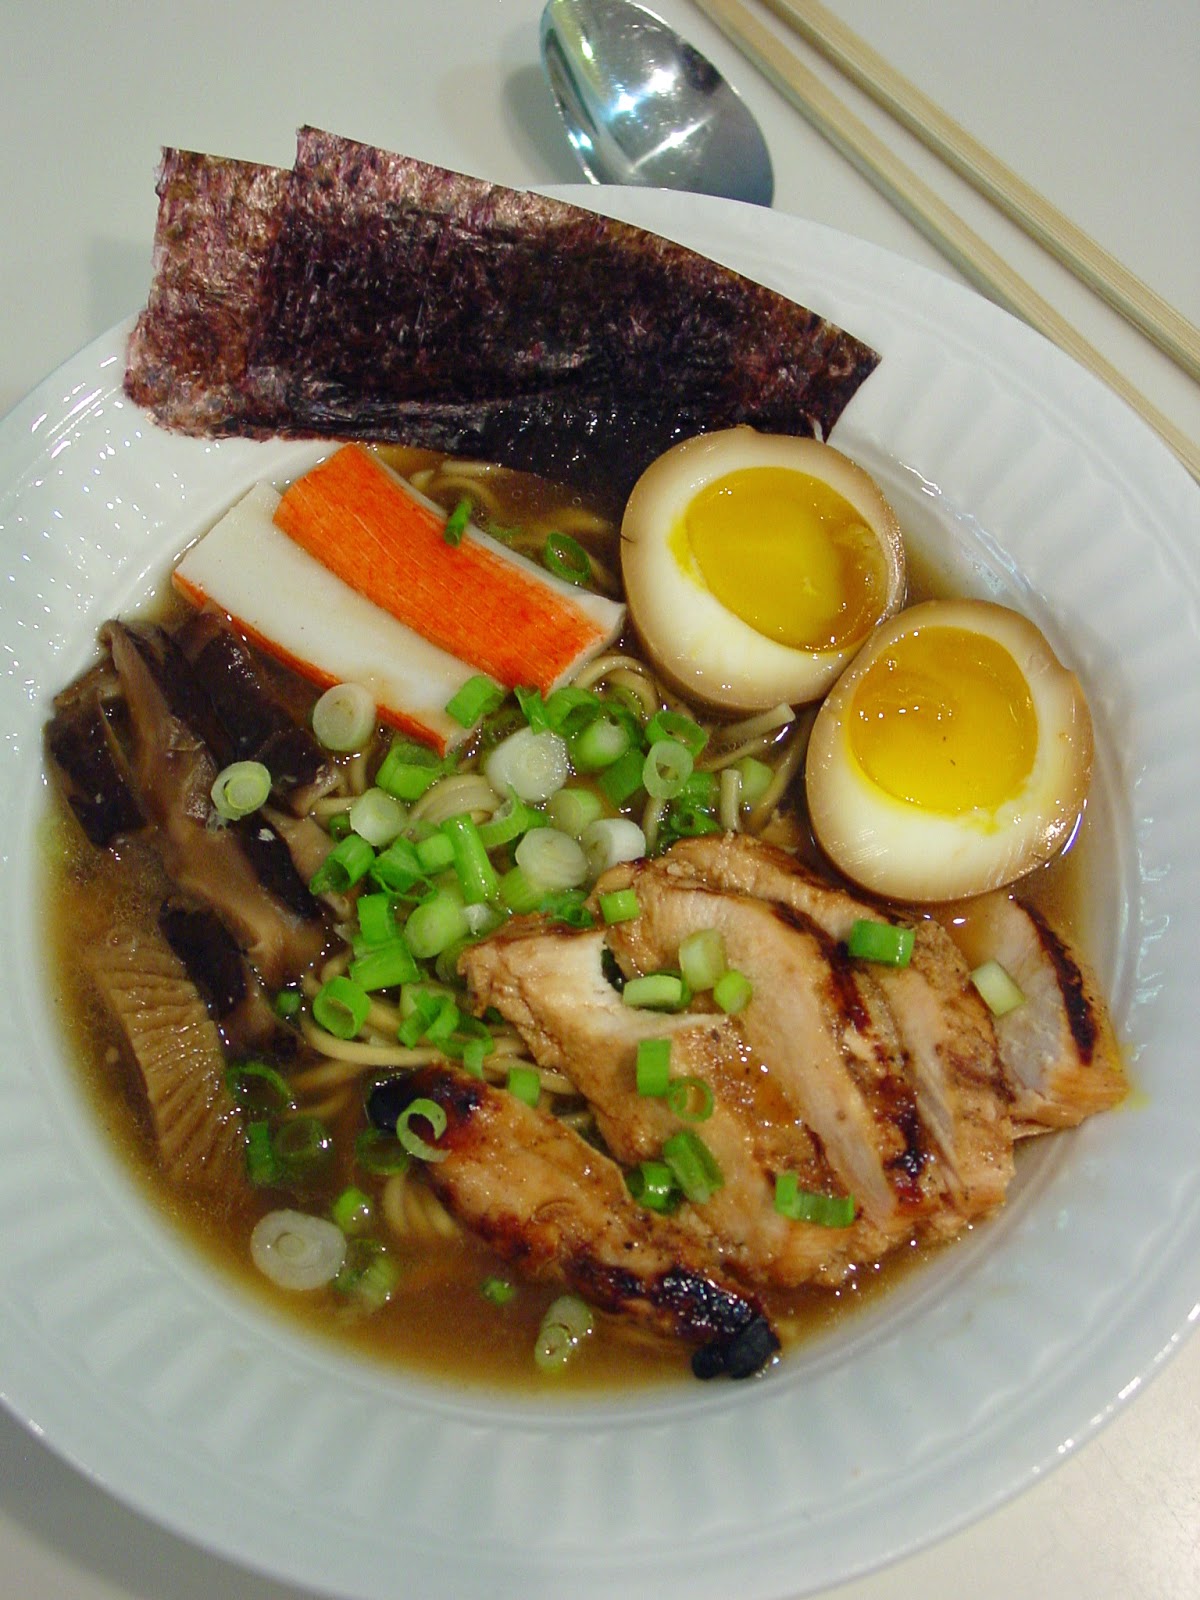
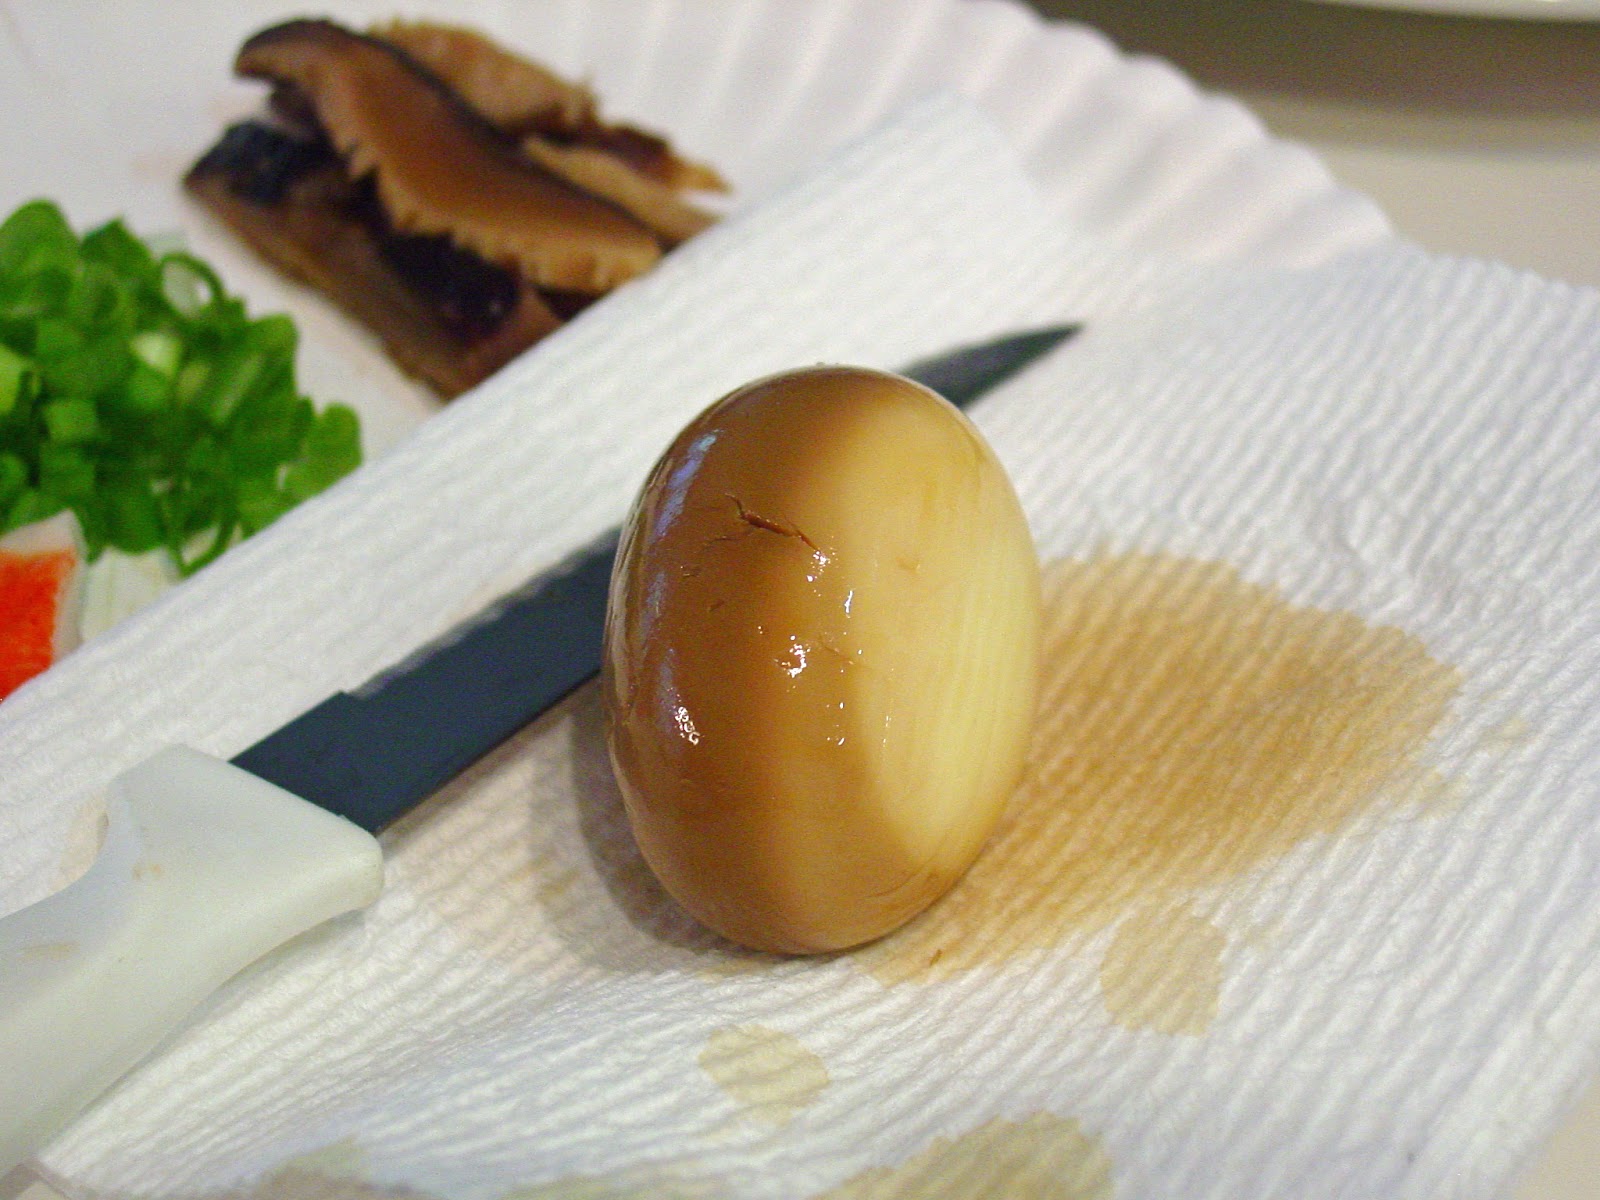
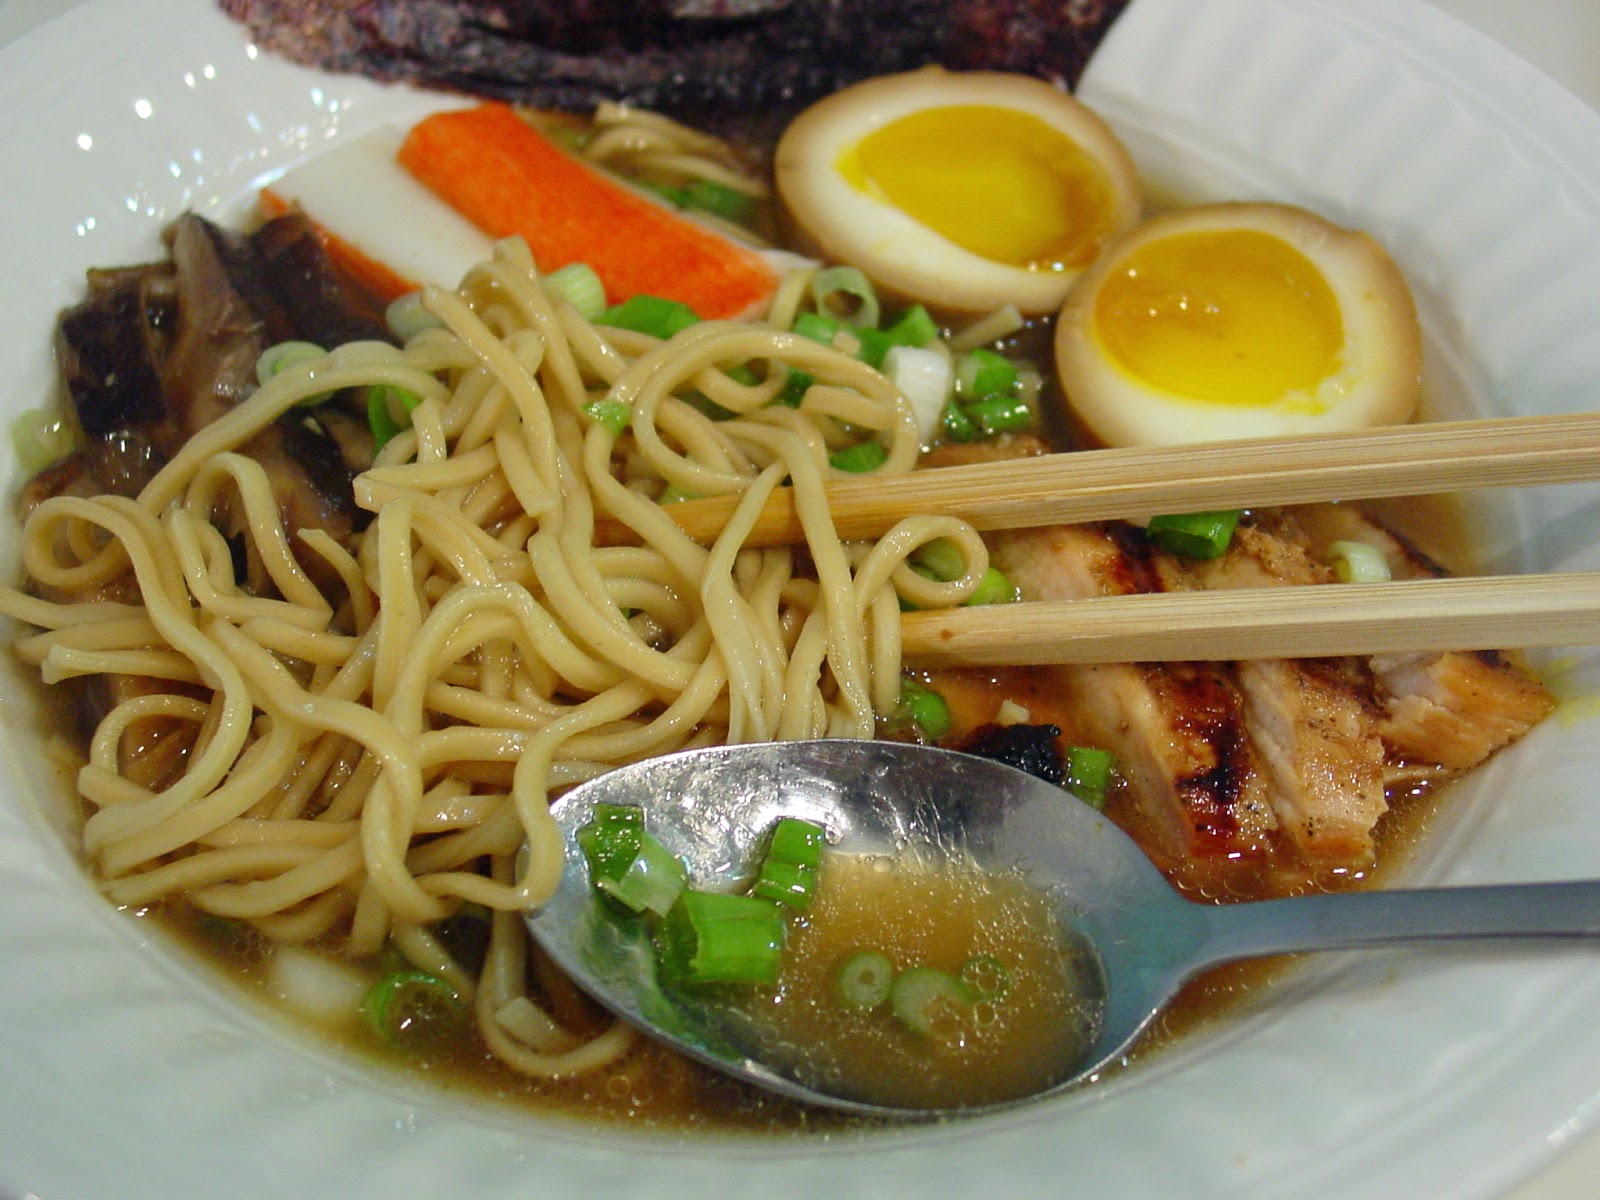
ramen, just the cheap packaged ramen. I was really impressed. The broth was creamy looking not clear. And the first bite well it was almost smoky and definitely savory. So good! The bowl was beautiful too, loaded with lots of flavorful toppings; like nori, green onion, fish cake (another first), perfect grilled chicken and a ramen egg. The RAMEN EGG! Oh my gosh! I was so surprised with that savory, salty little egg. It was so good! I can’t wait to go to a ramen house one day. I really loved it! So when I got home I started to do some research.

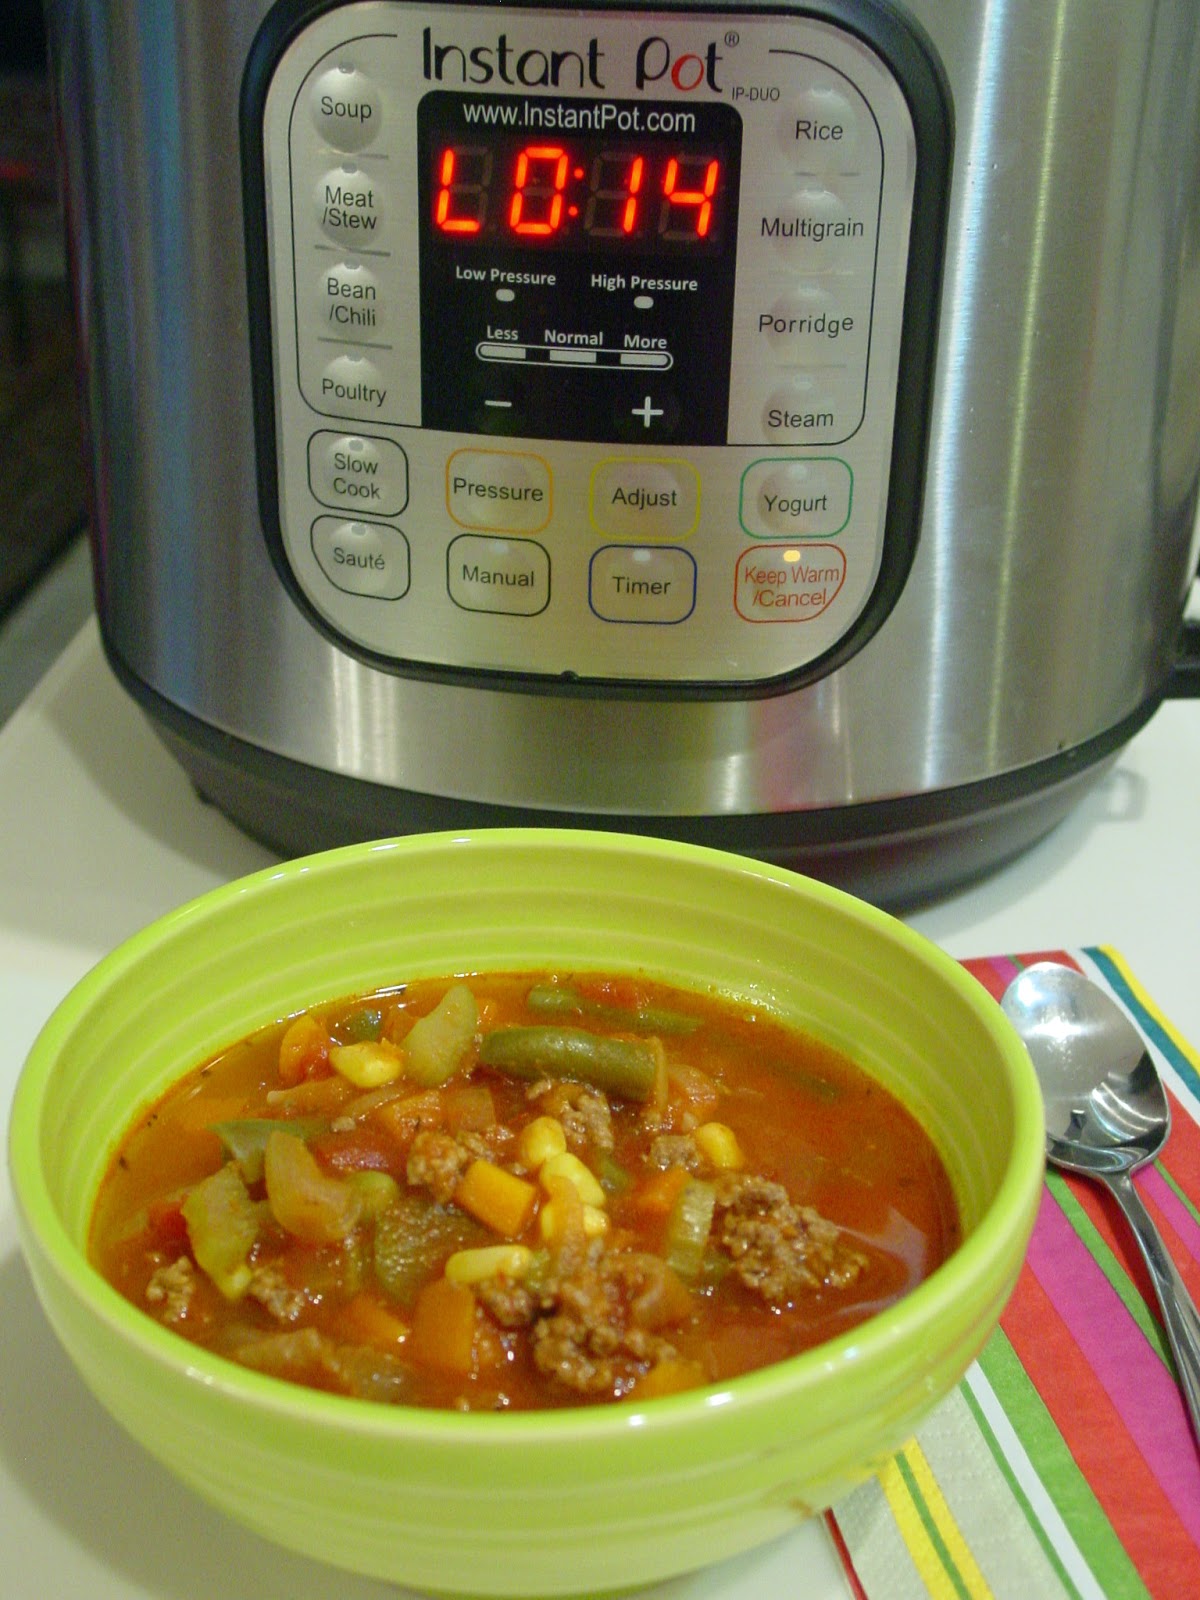
I started by searching for instant pot recipes. Wait! Did I tell you dear sister bought an instant pot during the Amazon Prime Day sale. She is keeping it at my house. [Smile] So that means I got a new toy. I have been using it more than I thought I would. So look forward to more instant pot recipes in the future. This being the very first. Anyway... I knew I wanted to make the eggs and the broth in the instant pot. I found a few recipes but the broth did not look the same. So I kept searching. In the end, I used a little bit of every ramen recipe I read or watched to make this ramen. I made sure to roast the bones like one recipe said to do. I added chicken bones to mellow the flavor like another recipe suggested. I made sure to brown the onions like another recipe insisted. I added dried mushrooms for umami as one recipe recommended. I made sure to stir the broth breaking up the bones to get that creamy broth rather than a clear liquid. I seasoned the broth with the flavors of Japanese soup base as another blog suggest. I used mirin, tamari, and instant dashi for the kombu and bonito flavors. It turned out so good! Very close to the inspiration ramen I had at Sake Sushi. I even made the ramen egg too. I need to work on my technique with this one. The flavor is spot on but as you will see in the photos the shape and color was uneven. I made the mistake of putting something on top to weight it down in the marinade. So one side was squished and had less color and therefore flavor. Don't weight it down! I have four in the frig right now secured with a rubber band and hanging from a chopstick across a plastic container. I feel this is going to turn out much better. My favorite parts of this ramen is the broth, ramen egg and chicken; in that order. I think you should definitely make sure to put those ingredients in your bowl. Maybe add some green onion, not too much just a little sprinkle. The chicken was a surprise to me too. The mirin really added to the color and grill marks. I have never had grilled chicken turn out that attractive. I may start adding mirin to more marinades.

This whole experience was a lot of fun. I made six - two cup containers of ramen broth. I put three in the freezer right away. So now I have it just waiting on me to have a craving. This was time consuming not instant as the title might suggest. But the instant pot was an invaluable tool to the process. It let me develop great flavor in less time and really made the broth spectacular. I see myself doing this again real soon. I hope you give it a try. If you have instant pot or ramen tips for me please comment. I would love to hear about your successes too.


Instant Pot “Sake” Special Ramen
Makes 12 cups of broth; 6 servings

Ingredients

For ramen eggs:
3 eggs
3 Tbsp. reduced sodium tamari (or soy sauce)
3 Tbsp. mirin
9 Tbsp. water

For broth:
2 to 3 lbs. pork neck bones
1 to 2 frozen rotisserie chicken carcasses
1 Tbsp. canola oil
1 large yellow onion, sliced
3” piece of ginger, peeled and sliced
2 large cloves garlic, smashed and peeled
4 green onions, whole
3 dried black mushrooms
5 Tbsp. reduced sodium tamari (or soy sauce)
2 Tbsp. mirin
1 tsp. sesame oil
1 tsp. miso paste
1 tsp. instant dashi granules

For grilled chicken:
2 boneless skinless chicken breast
Reduced sodium tamari (or soy sauce)
Mirin
Sesame oil
Black pepper

For ramen bowl:
6 servings Ramen noodles, boiled to package directions
Ramen broth

For toppings:
Ramen eggs, halved
Fish cake or imitation crab, sliced
Toasted nori
Grilled chicken, sliced
3 green onions, sliced
Mushrooms, reserved from broth and sliced

Directions

Ramen eggs:
Combine tamari, mirin and water in a plastic bag. Set aside.

Place steam rack inside the pressure cooker. Add exactly 1 cup of cool tap water into the pot. Place eggs straight from the refrigerator in the center of the pot. Cook at Low Pressure for 5 minutes*, then quick release (QR).

After quick release, immediately take out the eggs and soak in ice bath to stop them from cooking. Let them cool for 5 minutes or longer.

Gently peel the eggs. Put the eggs in the sauce bag and close tightly. The eggs should be submerged in the marinade. Marinate for at least 3-4 hours in the refrigerator. I recommend overnight.

Take the eggs out of the marinade and discard the marinade. Cut each egg in half to serve. Enjoy the eggs as is or place them in your ramen bowl as a topping.

*Note: Want to know how to cook the eggs just like you like them. [Click Here] to learn how to cook soft, medium or hard boiled eggs in your pressure cooker.


Ramen broth:
Preheat oven to 400 degrees.

Place pork neck bones in a roasting pan, season with sea salt and black pepper. Roast for 45 minutes, flip bones over and roast 30 minutes.

In the last few minutes of cooking time, place instant pot on saute. Add canola oil and sliced onion. Cook the onions until brown on one side then flip to brown on the other side. Stir to separate into rings and brown evenly. Turn off and add a little water if necessary to prevent burning.

When pork has finished roasting, transfer the bones to instant pot with the onions.  Immediately pour off fat and discard. Add 1-1/2 cups of the water to the pan, and use a spoon to scrape the browned bits off the bottom of the pan.

Transfer the pan drippings to instant pot with the onions. Add chicken bones, ginger, garlic, green onions, and mushrooms. Add cool water to the max fill line. Set the instant pot to cook under high pressure for 30 minutes. When cycle is complete let rest 5 minutes and perform a quick release. Stir the pot really well. Scraping the bottom of the pot and breaking up bones. Set the instant pot to cook under high pressure for another 30 minutes. When cycle is complete let rest 5 minutes and perform a quick release. Stir the pot really well again, breaking up bones some more. Place the instant pot to saute and bring to a boil. Boil for 5 minutes or longer. Turn off if broth begin to splash over the edge of the pot liner.

Let the liquid cool for a little while. Reserve the mushrooms and set aside. Remove the other solids and discard, then strain the stock through a fine mesh strainer, and transferring the liquid to another container. Clean the liner of the instant pot and pour broth back into pot. Season broth with tamari, mirin, sesame oil, miso and dashi. Keep warm and allow flavors to blend.

Serve the broth, refrigerate overnight and remove the fat cap (if you prefer) before re-heating or freeze for your future bowls of ramen.


Grilled chicken:
Place chicken breast in a freezer bag pound to even out thickness. Season chicken with black pepper, a drizzle of sesame oil and equal parts tamari and mirin to cover chicken. Marinate 20 minutes at room temperature, flipping and moving around in the marinade at least once half way through marinating time.

Preheat grill for 10 minutes, lower heat to medium high. Remove chicken from marinade and grill chicken for 6 minutes, flip chicken and grill for 6 more minutes or until internal temperature of 160 degrees is reached. Remove from grill and rest at least 10 minutes before slicing. Slice chicken for use as a topping.


Ramen bowl:
To assemble the ramen, cook the noodles (discarding any flavor packets), according to package instructions.

Divide the noodles between bowls. Pour the hot broth directly over the noodles, then add whatever toppings you desire. Serve immediately.


Linking to:
Kahakai Kitchen: Souper Sundays

Sunday, August 21, 2016

Green Goddess Hummus

A few weeks ago I made and shared Green Goddess Dressing with you. This dressing is so different and very delicious. I could not help but think it would make a great Hummus flavor too. So I tried it right away. I used the microwave hummus method and substituted a little mayonnaise and sour cream for the tahini. I used the fresh herbs like in the dressing, chives and parsley are perfect in the hummus too. I tried it with garlic and it was too strong. I did experimented with the anchovies a bit. The first time I made it I just used maybe three and thought it needed more. I added all the anchovies from the dressing recipe and it was delicious and savory. However, I did notice the last serving of hummus was stronger in that anchovy flavor than the first. So if you are new to anchovies you may want to start with half of the amount and add to taste. I served it with all green veggies but it is delicious with any vegetables. I recommend giving it a try if you are looking for a new and savory way to eat more hummus.


Green Goddess Hummus
Makes 2 cups

Ingredients

15 oz. can chickpeas, undrained
2 oz. can anchovy fillets, or to taste
1/2 cup chopped parsley
3 Tbsp chopped chives
Tbsp Mayonnaise
Tbsp sour cream
1-1/2 Tbsp tarragon vinegar
Kosher salt and black pepper, to taste

Directions

Microwave undrained chickpeas in a mixing bowl for 4-5 minutes, set aside.

Put all other ingredients in a blender; blend until herbs are very fine, smooth and green in color. Add chick peas only, process until smooth and creamy, scraping down sides as needed. Add chickpea liquid one tablespoon at a time until desired consistency (3 Tbsp.), it will thicken once refrigerated. Taste and adjust seasonings as needed.

Cover and refrigerate until needed. Best if allowed to blend for some time. It tastes even better after refrigerated and flavors have had time to develop.

To serve, garnish with a little olive oil and chives. Serve with veggies, crackers and/or pita. Keep leftovers in the refrigerator for up to 1 week. 


Monday, August 15, 2016

Masonable Mondays #4 - Open Dome Top

Welcome to Masonable Mondays #4! I must admit this post is more about another way to use all those fruit cups. No recipes today, sorry! The weather is kind of wet up here in north Louisiana and since I sprained my ankle I have been a little reluctant to go out in wet conditions. So expect a more elaborate post using this same idea in the future. I just couldn't make my sure footed self go out to the store in this weather. In the mean time I am glad to share this idea with you.

Did you know you can use that fruit cup as an open dome top with just the ring? It basically add more head room to each jar. Now you can pack more in each jar. You can protect a frosted cupcake and send a surprise in a loved ones birthday lunch.


It is so simple! Place your cupcake in a half pint wide mouth jar.


Place the fruit cup inverted over the top. 
No need for the flat sealing top, it sits on the edge of the jar.


Then secure the cup in place with the ring. Done! 
Now you can send a birthday wish to anyone you love.


This idea would work for so many things from sweet to savory. Here are a few for you to try:

Sweet

The dome top would allow you to prep desserts ahead of time or for a large group. Think about Ice Cream Sundaes, Trifles, Pie a la Mode, Strawberry Shortcake with Whipped Cream, Cookies layered with Whipped Cream and Parfaits. That dome has a lot of room for whipped cream and icing.

Savory

This dome isn't just for desserts. It can help pack savory foods as well. Think about meatloaf in cupcake form. You can pack Meatloaf with a swirl of Mashed Potato Topping. Or place a cornbread muffin on top of your comfort food like
Chili, just place a Cornbread Muffin upside down on top. The fruit cup with cover all that goodness. How about filling the jar with Spaghetti and sauce then placing a big Meatball on top. Now that is a great lunch.

I hope this has inspired you to use your mason jars and fruit cups in a few more ways. Be sure to leave a comment and let me know what you plan to put in your #Masonables.


Monday, August 8, 2016

Masonable Mondays #3 - Cheese Balls

Welcome to Masonable Mondays #3! Today we are doing after work snacks. I hate to admit this but at some point in my life I could make dinner out of wine and a cheese plate. I don't do that now! Well not often. But I do enjoy the idea. So this week I decided to make a cheese board in a mason jar. I filled each mason jar with juicy green grapes. Then I made two savory and flavorful mini cheese balls to suspend in a fruit cup. I made one with blue cheese and pistachios and another with jalapenos and bacon. You can't get board with these flavors. I packed the top fruit cup with some whole wheat Ritz crackers. This after work treat is definitely something to rush home to. Or take your snack outdoors. This Masonable would make great picnic food to share with friends. I hope this inspires you to roll some cheese balls of your own. Be sure to share your creations. I always love more #Masonable ideas.


Cheese Ball Masonable
Serves 1

Supplies

1 wide mouth pint Mason jar
2 empty fruit cups

Ingredients

Grapes
Cheese Ball of choice
8 round crackers

Directions

Add grapes to the bottom of the mason jar. Add fruit cup and place cheese ball in cup. Add lid and stack crackers on top of lid. top with inverted fruit cup and secure with mason jar ring. Store in refrigerator until ready to eat.


The first cheese ball I made was based off of a blue cheese cheesecake we have made for the Christmas holidays several times. It is savory and "funky" in a good way. I love the blue cheese, green onions and pistachios. It is very flavorful. Dear sister thought this one was her favorite. She said it was the more exciting of the two cheese balls. I have to agree.


Blue Cheese Balls
Makes 6 Balls

Ingredients

4 oz. 1/3 light Neufchatel cheese, softened
1/2 cup reduced fat blue cheese crumbles
1 green onions, finely chopped
kosher salt, black pepper and red pepper flakes, to taste
4 Tbsp. pistachios, shelled and finely chopped
Handful of parsley, finely chopped

Directions

Combine Neufchatel cheese, blue cheese and green onions in a small bowl. Season with salt and peppers. Mix well so all ingredients are evenly distributed. Refrigerate for 30 minutes. Divide mixture into six and roll into a balls. Place in a shallow dish of pistachios and parsley; roll to coat pressing to cover each ball with nut and herb mixture. Serve with crackers and fruit.

Note: You can roll this recipe into as many cheese balls as you like. Make one cheese ball or even 8 mini cheese balls with a pretzel stick like a lolly pop.


The next cheese ball is both spicy and savory. It is reminiscent of a jalapeno popper. The center is creamy cream cheese, Mexican blend cheese and pickled jalapenos. A classic combination of yummy ingredients. To finish, each cheese ball is rolled in crispy, salty bacon. Why? Because bacon is always a good idea.


Jalapeno Popper Cheese Balls
Makes 6 Balls

Ingredients

4 oz. 1/3 light Neufchatel cheese, softened
1/2 cup 2% Mexican cheese blend
2 Tbsp. chopped pickled jalapenos
kosher salt, black pepper and red pepper flakes, to taste
6 slices bacon, pre-cooked and finely chopped

Directions

Combine Neufchatel cheese, cheese blend and jalapenos in a small bowl. Season with salt and peppers. Mix well so all ingredients are evenly distributed. Refrigerate for 30 minutes. Divide mixture into six and roll into a balls. Place in a shallow dish of bacon and roll to coat pressing to cover each ball with bacon. Serve with crackers and fruit.

Note: You can roll this recipe into as many cheese balls as you like. Make one cheese ball or even 8 mini cheese balls with a pretzel stick like a lolly pop.


Linking to:
Ramblings of a (Bad) Domestic Goddess: Turn it Up Tuesdays
Carole's Chatter: Food on Friday - Cheese

Related Posts Plugin for WordPress, Blogger...