Sunday, July 31, 2016

Green Goddess Dressing

Growing up there was this restaurant or diner that the family would go to called Murrell's. It was open 24 hours and served everything from breakfast, burgers to plate lunches. At different stages in life it played a bigger part than others. When I was little it was were the family went for a hot meal usually beef tips and rice. They always had a three bowl server on the table with salad dressing in it. Kind of scary now! One of the dressing was green goddess. Murrell's was the only place I remember having it. It was delicious and a family favorite. In high school Murrell's became a place we would meet after school usually for their seasoned fries. By this time the green goddess dressing was kept in a squeeze bottle in the cooler and brought to the table when you ordered a salad. Thank goodness!!! By the time I was in college Murrell's was where we would end up after going out to see a band. Sometimes breakfast was ordered or maybe more fries. Lots of memories of those times come flooding back. I would go back there when I was working for plate lunches with co-workers or to meet friends on the weekend for a late breakfast or burgers. It was so sad when they closed it. But lucky for us I found the green goddess dressing recipe on the Facebook page Remember in Shreveport when... I have made it several times and remembered Murrell's fondly.

Well Friday night we had a girl's night and Mom, dear sister and I tried out sister's new Instant Pot. We made our family recipe for Beef Tips with Mushrooms and a green salad with Green Goddess Dressing. Just like back in the day at Murrell's. It was a really fun evening. I conquered my slight fear of pressure cooking and recreated family memories. The Instant Pot is amazing! It cooked the beef perfectly in like 20 minutes. The traditional recipe takes like an hour and a half. Everyone really enjoyed the meal. I see many Instant Pot post in the future. But this post is about the dressing. 

Green Goddess Dressing is both creamy and savory. It uses both mayonnaise and sour cream for the base of the dressing. The savoriness comes from fresh herbs and anchovies. Yep I said anchovies! Now don't leave yet. Trust me if you haven't had anchovies in a dressing or sauce please try it. It is not like those salty little fishes on pizza. When you cook with them they add a unrecognizable depth of savoy flavor to your dish or dressing. Think of it as salt or Parmesan or blue cheese. It can be strong or you can over do, but used in the right way it is magical. This dressing is a must try it is so different and very delicious.


Green Goddess Dressing
Makes about 3 cups

Ingredients

2 oz. can anchovy fillets
1/2 cup chopped parsley
3 Tbsp chopped chives
1 cup Mayonnaise
1 cup sour cream
2 Tbsp tarragon vinegar
1/2 tsp salt
Dash of freshly ground pepper

Directions

Put all ingredients in a blender; blend until herbs are very fine and dressing is smooth and light green in color. Cover and refrigerate until needed. Best if allowed to blend for some time.


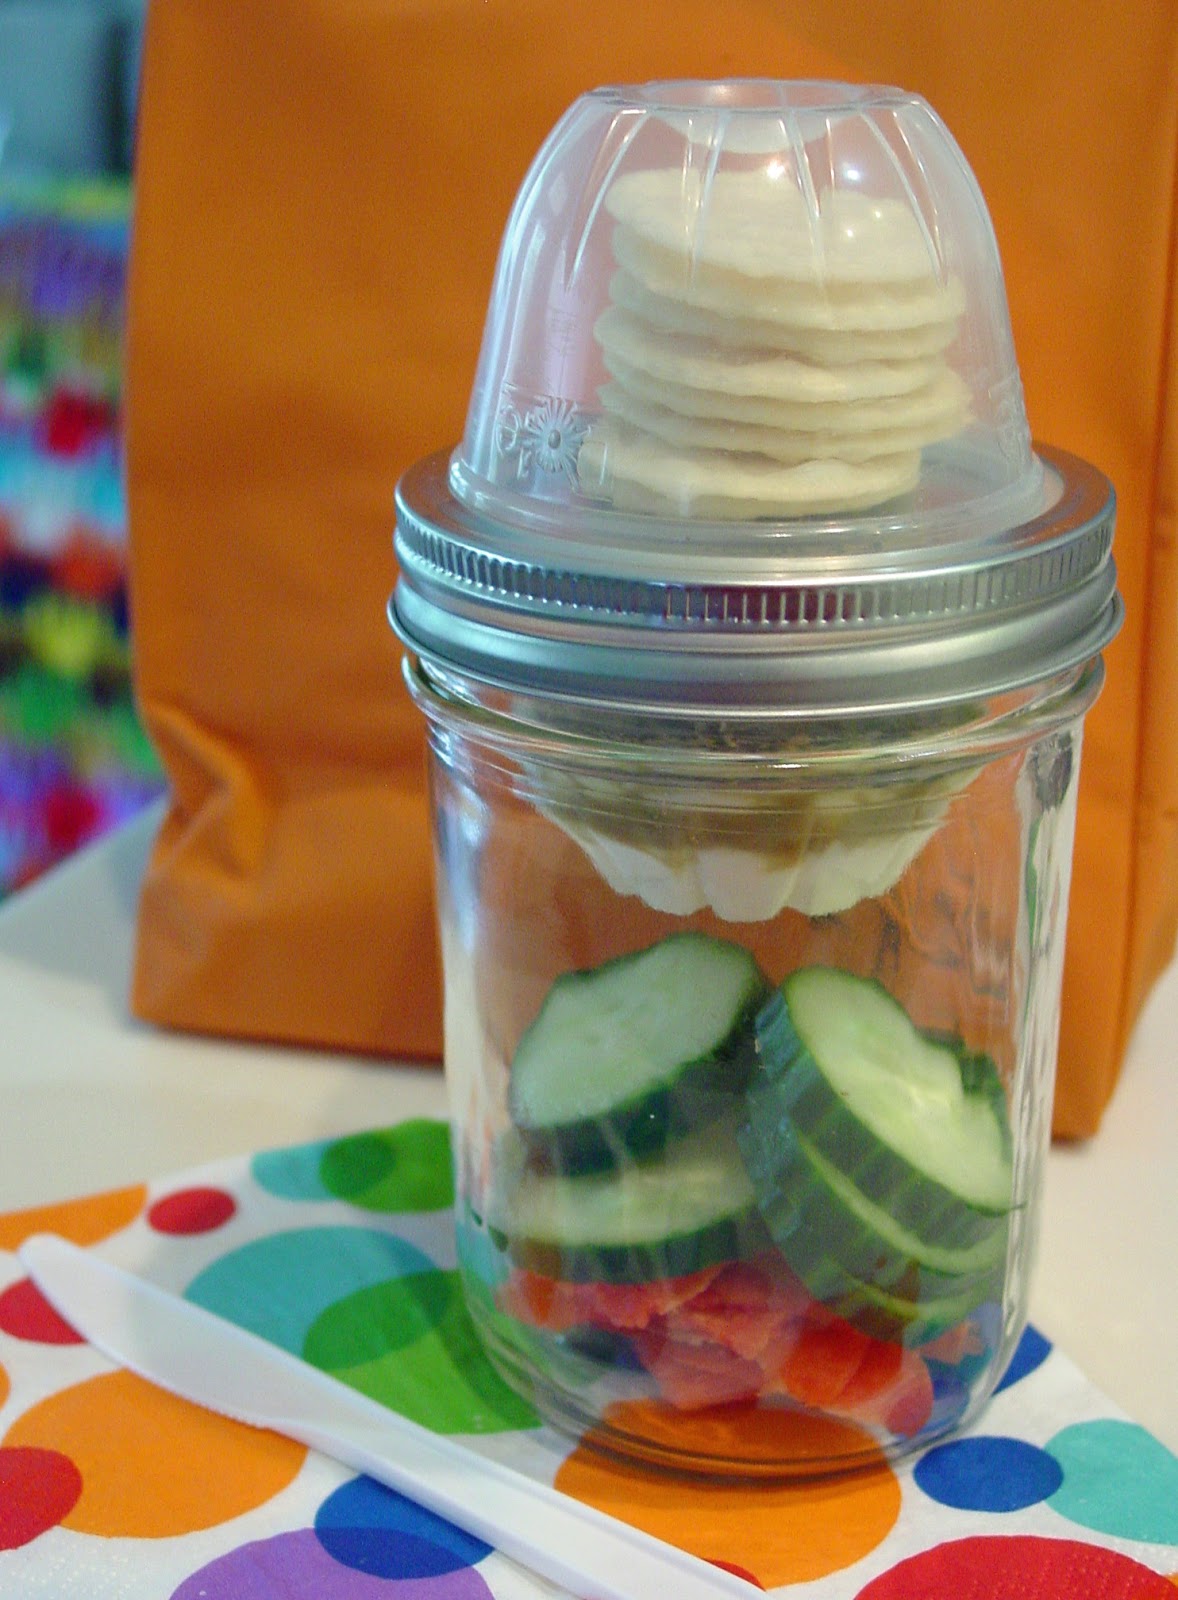
Since the dressing recipe makes 3 cups, I was able to make
 a couple of Masonables. I made a mason jar salad.


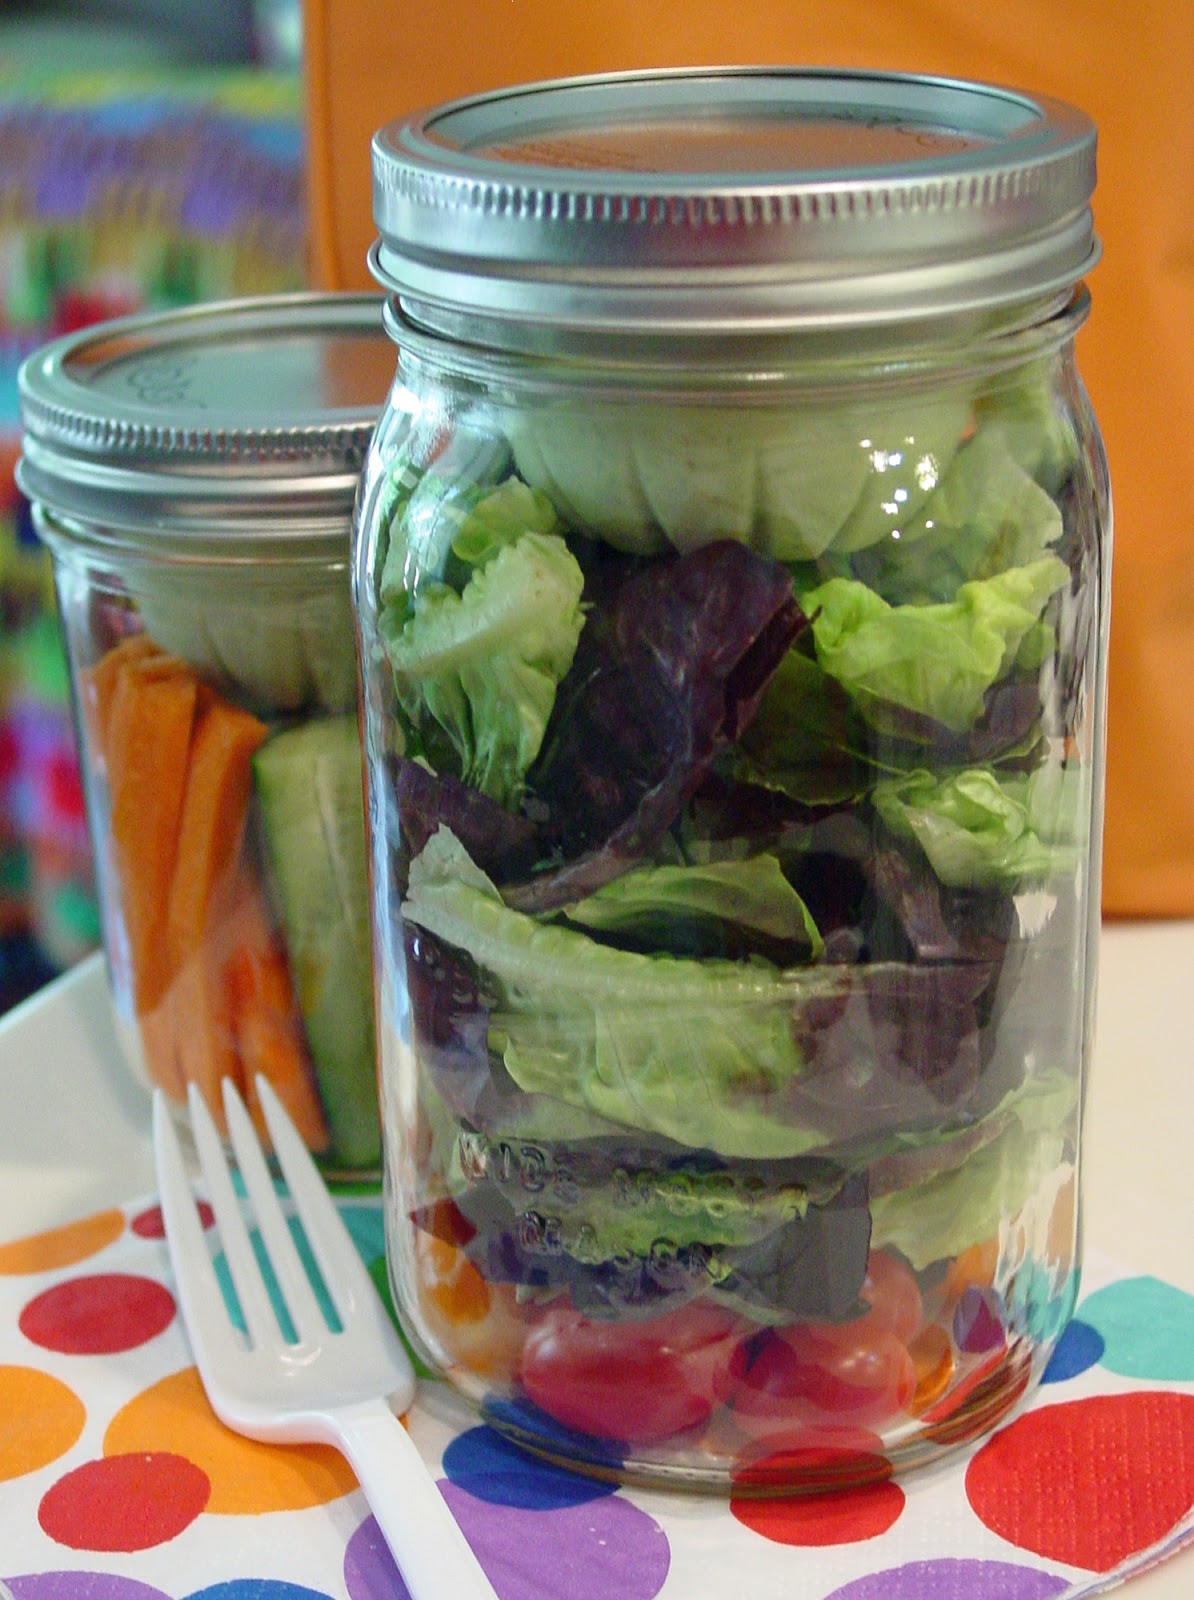
And a Masonable with celery, carrots and cucumbers 
with Green Goddess in the fruit cup.


Don't you want to take a dunk?

Linking to:
Ramblings of a (Bad) Domestic Goddess: Turn It Up Tuesdays
Dizzy, Busy & Hungry: Wine'd Down Wednesday

Baked Eggs with Avocado

I am still in love with Baked Eggs. I made two new styles with avocado this weekend. I have been seeing all the pins on Pinterest about baking eggs in avocado halves. So why wouldn't avocados make a great baked eggs ingredients? Both styles were delicious! Very fresh tasting. The California style is veggie packed with spinach, tomatoes, mushrooms and creamy avocado. This one needs a bit more salt for some reason. So sprinkle to taste. It just helps to highlight all the fresh veggie flavor. The Bacon, Avocado & Tomato style was my favorite. It taste like a BLAT without the lettuce. It is so tasty! It has everything something fresh, crispy and creamy. Love it! The only con is the Avocado does brown little so the color is not as pretty as when it is first sliced. But I really like the warm creamy avocado. So you be the judge. Bake the avocado or add it as a garnish, just be sure to enjoy more avocado!


Cooking Method

Preheat oven to 425°F. Lightly spray ramekin with cooking spray. Place veggies, bacon if using and avocado around the edges of the ramekin. Creating a small well in the center of the ingredients. Crack 1 egg into the well. Season eggs with Krazy salt and pepper. Bake for 10 minutes for a running yolk; 12 minutes to set the yolk. Ovens vary so adjust time to cook eggs to your liking. Garnish and serve immediately.


Bacon, Avocado & Tomato Baked Eggs
8 or 10 grape tomatoes, halved
1/2 avocado, peeled, pitted and chopped
1 slice pre-cooked bacon, chopped
1 large egg
Jane's Krazy Salt and black pepper, to taste


California Baked Eggs
Handful of baby spinach leaves
6 grape tomatoes, halved
1 mushroom, sliced
1/2 avocado, peeled, pitted and chopped
1 large egg
Jane's Krazy Salt and black pepper, to taste


For more Baked Eggs check out this older post


Linking to:
Dizzy, Busy & Hungry: Wine'd Down Wednesday

Monday, July 25, 2016

Masonable Mondays #1 - Sushi Inspired

The #Masonable is getting so much attention right now. Everyone is sharing it on Pinterest, Facebook, on their blogs and YouTube. There was even a news station in Arizona that did a segment on their midday news. It is so exciting that everyone loves the idea and wants to share it or put their own twist on it or maybe I should say in it.

In light of all the buzz and attention the #Masonables have been getting I have decided to run a post every Monday with a new idea, tip or trick using those wonderful mason jars and fruit cups. This will be the very first #MasonableMondays of many more to come. 

This Monday I got inspiration from Sushi and the tasty eats from Japanese restaurants. I made a few classics in a jar like Miso Soup, Gyoza and a Salad with Ginger Dressing. Then I made 3 jars that you would never see in a sushi restaurant. It is not sushi, it is "Sushi-ish". A real sushi roll uses seasoned rice to keep all the tasty ingredients in a nice neat bite. I am using rice crackers to make a stack-able sushi bite. Any one jar would make a great snack. Pack any two or heck more depending on your appetite for a great lunch. So read on for 6 Sushi Inspired Masonables.


California "Sushi" Masonable

The first masonable I decided to make was inspired by a California Roll. This roll is probably one of the most popular on sushi menus. It is cool and refreshing with avocado, crab and cucumber. My version is also crunchy with rice crackers as the base of each bite. Like sushi these California stacks are best consumed in one big bite.


California "Sushi" Masonable
Serves 1

Supplies

1 wide mouth pint Mason jar
2 empty fruit cups

Ingredients

8 round rice crackers
8 slices of imitation crab or crab sticks
8 slices of English cucumber
1/2 an avocado, pitted, peeled and diced
1/4 tsp. wasabi
1/4 tsp. light soy sauce
1/4 tsp. rice vinegar
Furikake*

Directions

In a small bowl combine wasabi, soy and vinegar. Mix until wasabi is dissolved. Add avocado and stir or mash until avocado is well coating in the wasabi mixture. Set aside.

Fill mason jar with slices of crab stick and cucumber. Place one fruit cup in the top of the jar and spoon in the avocado mixture. Sprinkle top with Furikake*. Place lid on top of the cup. Stack rice crackers on lid. Place fruit cup inverted on top of crackers and lid. Add mason jar ring to secure everything in place. Refrigerate until ready to serve.

*Note: If you cannot find Furikake you can garnish with sesame seeds and finely sliced nori (dried seaweed).


Philadephia "Sushi" Masonable

This might be my favorite of the "Sushi" Masonables. I am a sucker for smoked salmon and cream cheese. In fact this combination would make a delicious appetizer for a party. It does take some patience to layer the cream cheese and wasabi. Make sure the cream cheese is softened to make it a bit easier to spread. This one does have a bit more wasabi but it is not too much, just stick to the one big bite rule and all the flavors will combine into a perfect bite.


Philadephia "Sushi" Masonable
Serves 1

Supplies

1 wide mouth pint Mason jar
2 empty fruit cups

Ingredients

8 round rice crackers
8 slices of smoked salmon
8 slices of English cucumber
2 oz. light cream cheese, softened
1/2 tsp. wasabi
1/4 tsp. light soy sauce
Furikake*

Directions

In a small bowl combine wasabi and soy. Mix until wasabi is dissolved. Set aside.

Fill mason jar with slices of salmon and cucumber. Place one fruit cup in the top of the jar and spoon in half of the cream cheese. Spread into a smooth flat layer. Top with wasabi soy mixture. Top with remaining cream cheese and spread smooth. Sprinkle top with Furikake*. Place lid on top of the cup. Stack rice crackers on lid. Place fruit cup inverted on top of crackers and lid. Add mason jar ring to secure everything in place. Refrigerate until ready to serve.

*Note: If you cannot find Furikake you can garnish with sesame seeds and finely sliced nori (dried seaweed).


Miso Soup in a Jar

I love miso soup! I have been buying the instant packets for years. I just recently started making my own with instant dashi and miso paste. I usually make it in a mug under my keurig. Sometimes I include small cubes of tofu. But on this trip to the store they were out. It is still deliciously savory and warm. A perfect compliment to any of the "Sushi" Masonables.


Miso Soup in a Jar
Serves 1

Supplies

1 wide mouth pint Mason jar
1 empty fruit cup

Ingredients

3/4 tsp. miso
Tofu, finely diced (optional)
3/4 tsp. instant dashi
2" x 3" piece of Nori or Wakame, broken or sliced

Directions

Fill mason jar with miso and tofu if using. Place one fruit cup in the top of the jar and fill with dashi and nori. Place lid on top of the cup. Add mason jar ring to secure everything in place. Refrigerate until ready to serve. To serve remove jar from refrigerator and let jar come to room temperature. This is very important you do not want to add hot water to a cold jar. It will break. Add contents of fruit cup to jar and cover with 8 oz. hot water stir to combine and dissolve the miso. You can place jar on a Keurig and run without a pod on the medium setting. Again stir to combine and dissolve the miso and enjoy!


Gyoza in a Jar

This Gyoza in a Jar made me want a bigger jar! In fact I think I am going to have to buy the pint and a half jars (24 oz) now. Just so I can pack more Gyoza. I love these little dumplings and that dipping sauce is AMAZING! I used frozen dumplings in a bag this time. But I think I am going to make some homemade real soon. I need a Gyoza jar for each day of the week. Really I DO!


Gyoza in a Jar
Serves 1

Supplies

1 wide mouth pint Mason jar
1 empty fruit cup

Ingredients

3 or 4 frozen or homemade dumplings
Sesame Soy Dipping Sauce*

Directions

Cook dumplings according to package directions. Place dumplings in jar. Place one fruit cup in the top of the jar and fill with dipping sauce. Place lid on top of the cup. Add mason jar ring to secure everything in place. Refrigerate until ready to serve.

*Note: I made an individual serving of the sesame soy dipping sauce. I used 1 Tbsp. each soy sauce and rice vinegar, some green onion tops and just a smidge of all other ingredients. Many frozen dumplings come with a dipping sauce. If you are short on time feel free to add it to your fruit cup instead.


Salad Jar with Ginger Dressing

I always enjoy the salads at Japanese restaurants, it is definitely the dressings. You don't find ginger or miso dressing just any where. So I wanted to include a salad jar in the line up of sushi inspired jars. It turned out so good. The dressing is the star here as well. Check out the link below to the dressing I made. I love the tangy sweet flavor. Who knew ketchup, ginger and lemon played so nice together.


Salad Jar with Ginger Dressing
Serves 1

Supplies

1 wide mouth quart Mason jar
1 empty fruit cup


Ingredients

1/2 roma tomato, diced
1/4 cup cucumber, diced
2 Tbsp. shredded carrot
1 green onion, sliced
2 cups torn romaine lettuce
3 Tbsp. Ginger Dressing*

Directions

Layer mason jar with tomato, cucumber, carrot, green onion and lettuce. Fill the fruit cup with ginger dressing and place in the top of the jar. Place lid on top of the cup. Add mason jar ring to secure everything in place. Refrigerate until ready to serve.

*Note: I made half a recipe of a ginger dressing I found on YouTube. But if you are pressed for time you can use any store bought Asian dressing.


Spicy Cucumber Tuna Salad Masonable

I can't believe I almost forgot to share this one with you. That would have been a complete shame. This is the second time I have made this salad. I normally make a mayo based spicy tuna salad. But this one might be a little better. It is so good! I have also made it with leftover salmon too. Just as yummy! I love the sweet mirin with the spicy sriracha. The cucumber adds a little crunch and the sesame oil and seeds gives it a nutty finish. It is such a light and fresh twist on tuna salad.


Spicy Cucumber Tuna Salad Masonable
Serves 1

Supplies

1 wide mouth half pint Mason jar
1 empty fruit cup

Ingredients

10 round rice crackers
5 oz. can light tuna in spring water, drained
1/2 cup cucumber, diced
1 green onion, sliced
2 tsp. mirin
1 tsp. sriracha
1/2 tsp. sesame oil
1 tsp. soy sauce
Black and white sesame seeds

Directions

In a small bowl combine tuna, cucumber, green onion, mirin, sriracha, sesame oil and soy. Stir until well combined. Fill mason jar with cucumber tuna mixture. Garnish with sesame seeds and a dot of sriracha. Place lid on top of the jar. Stack rice crackers on lid. Place fruit cup inverted on top of crackers and lid. Add mason jar ring to secure everything in place. Refrigerate until ready to serve.

*Note: The cucumbers in this salad will weep so if you want to make it a day or two in advance, leave the cucumber out. You can serve it similar to the California Sushi Masonable and slice the cucumbers.


Linking to:
Tumbleweed Contessa: What'd You Do This Weekend?
Stone Cottage Adventures: Tuesdays with a Twist Link Party

Thursday, July 21, 2016

Baked Eggs 8 Ways

Before my ankle injury, I had become obsessed with baked eggs. I got the idea from the Domestic Geek. You can make so many different styles. I have made spinach, artichoke and cheese. I have made bacon, tomato and Swiss too. Mushroom is also delicious. I even made one Miga style with broken corn chips, salsa and cheese. The possibilities are endless! I LOVE the texture of the egg whites cooked this way. That is saying a lot because I am not an egg white fan. I usually find them a little rubbery, but baked eggs are softer. I really really like the texture. You can make them healthy with all veggies or decadent with lots of cheese, sausage and/ or bacon. It is all up to you. I have baked several ramekins at once and was able to cook them according to each persons taste. Dear sister likes her yolk set so I just left hers in longer. Easy! So here are eight ways to enjoy baked eggs. I hope you will find one to make for your breakfast.


Baked Eggs
Serve 1

Ingredients

Cooking spray
1 large egg
your choice of protein, veggies and/or cheese
Kosher salt, black pepper and seasonings, to taste

Directions

Preheat oven to 425°F. Lightly spray ramekin with cooking spray. Place protein, veggies and/or cheese around the edges of the ramekin. Creating a small well in the center of the ingredients. Crack 1 egg into the well. Season eggs with salt, pepper or seasonings. Bake for 10 minutes for a running yolk; 12 minutes to set the yolk. Ovens vary so adjust time to cook eggs to your liking. Garnish and serve immediately.

Variations:

Bacon Swiss Tomato Baked Eggs
Caprese Baked Eggs
Denver Baked Eggs
English Baked Eggs
Migas Baked Eggs
Mushroom Baked Eggs
Spinach and Artichoke Baked Eggs
Zucchini Baked Eggs

*Instructions and photos for all variations below.


Bacon Swiss Tomato Baked Eggs
10 or 12 grape tomatoes, halved
1 large egg
1 slice of Swiss cheese, chopped
1 slice pre-cooked bacon, chopped
Kosher salt, black pepper and red pepper flakes, to taste


Caprese Baked Eggs
10 or 12 grape tomatoes, halved
1 large egg
1 oz. fresh Mozzarella cheese or 3 Ciliegine balls, chopped
2 or 3 basil leaves, torn
Kosher salt, black pepper and red pepper flakes, to taste


Denver Baked Eggs
2 slices deli ham, chopped
2 Tbsp. onion, chopped
2 Tbsp. bell pepper (yellow, red or green), chopped
1 large egg
1 oz. cheddar cheese, shredded
Kosher salt and black pepper, to taste


English Baked Eggs
1 or 2 links pre-cooked breakfast sausage, chopped
1 small tomato, chopped
3 or 4 mushrooms, Quartered
1 large egg
Kosher salt and seasoned pepper, to taste

*Add a side of beans for a full English Breakfast.


Migas Baked Eggs
Handful of tortilla chips, crushed
1 large egg
2 Tbsp. salsa (green or red)
1 oz. cheddar or Mexican blend cheese, shredded
Sazon seasoning, to taste


Mushrooms Baked Eggs
5 or 6 mushrooms, sliced
1 large egg
Garlic powder, to taste
Dried thyme, to taste
Kosher salt, black pepper and red pepper flakes, to taste


Spinach and Artichoke Baked Eggs
4 to 5 oz. frozen spinach, thawed and squeezed dry
2 canned artichokes, quartered
1 large egg
approx. 1 oz. Italian blend or fresh Mozzarella or Parmesan cheese
Kosher salt, black pepper and red pepper flakes, to taste


Zucchini Baked Eggs
1 tsp. olive oil
1 clove garlic, sliced
1/2 zucchini, chopped*
1 roasted red pepper from a jar, torn
1 large egg
Kosher salt, black pepper and red pepper flakes, to taste

*Coat ramekin and zucchini with olive oil before adding egg.


So that is 8 ways to enjoy baked eggs!
But I am sure there are so many more ways 
to make this simple and easy dish.


Linking to:
Stone Cottage Adventures: Tuesdays with a Twist Link Party

Related Posts Plugin for WordPress, Blogger...