Thursday, September 24, 2015

Recycle Tip: Fruit Cups + Mason Jars

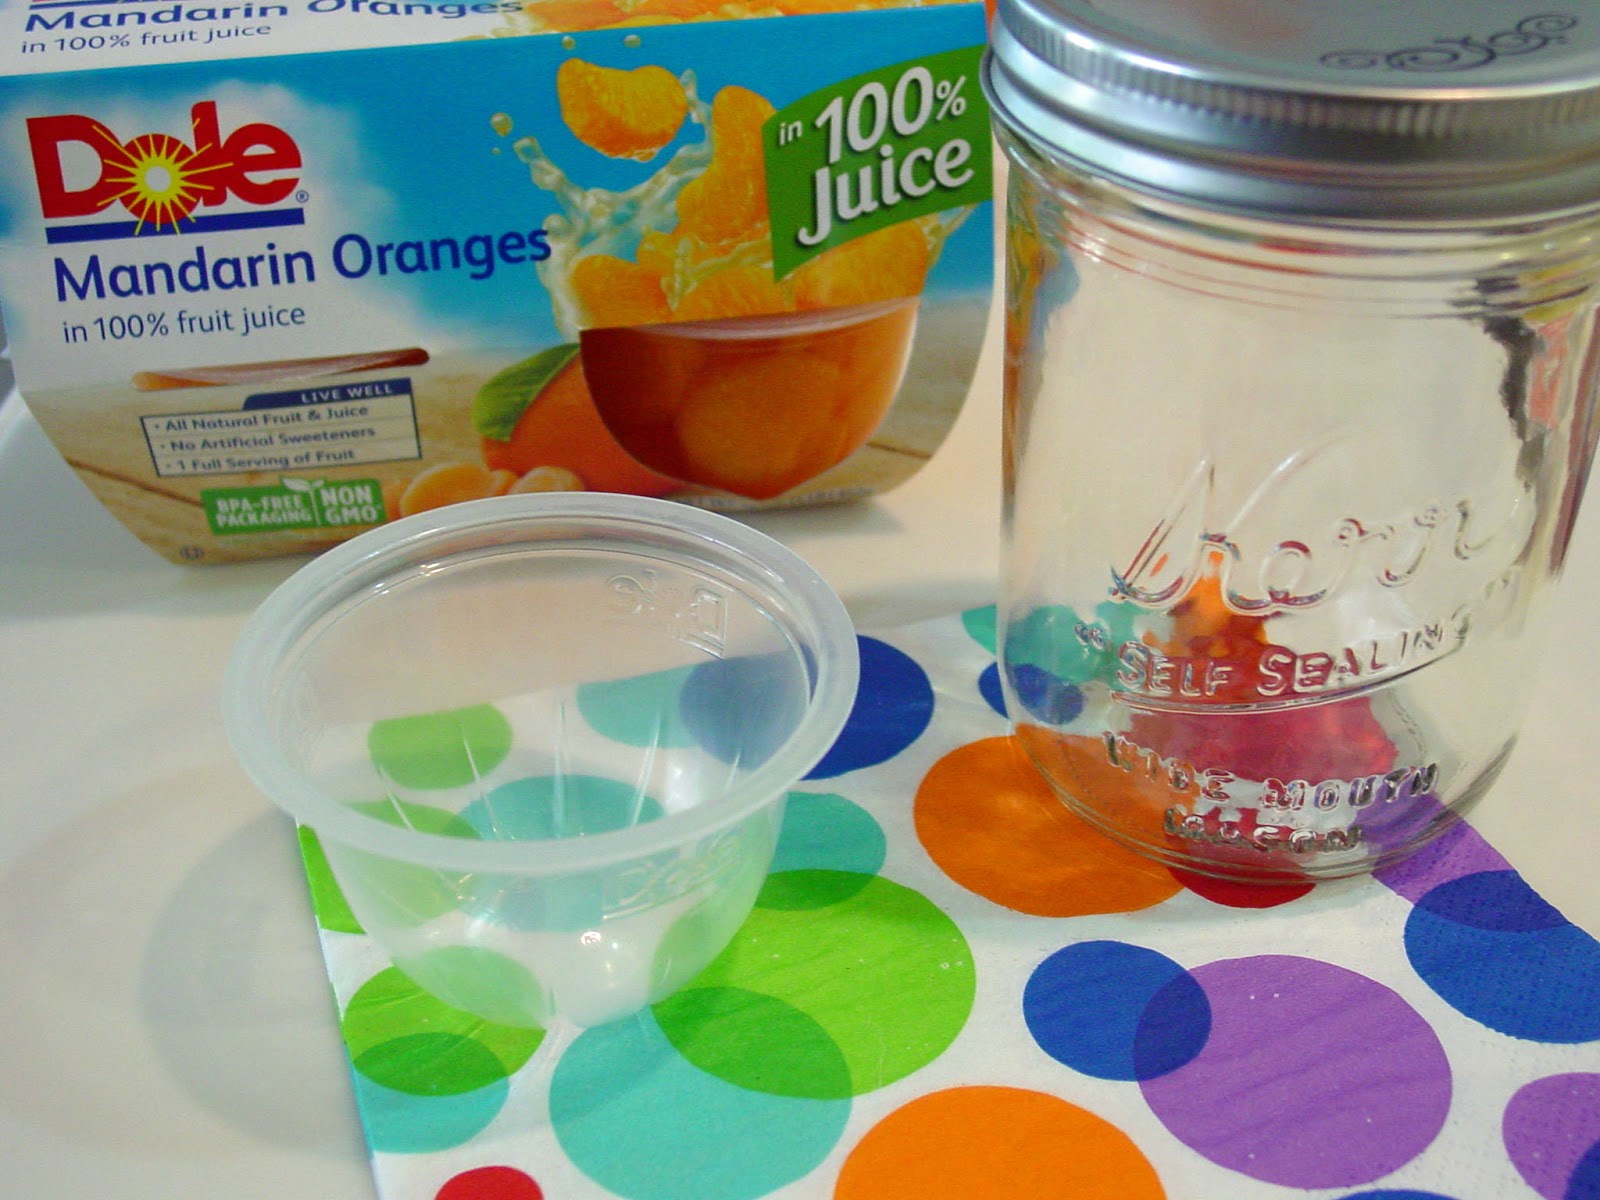
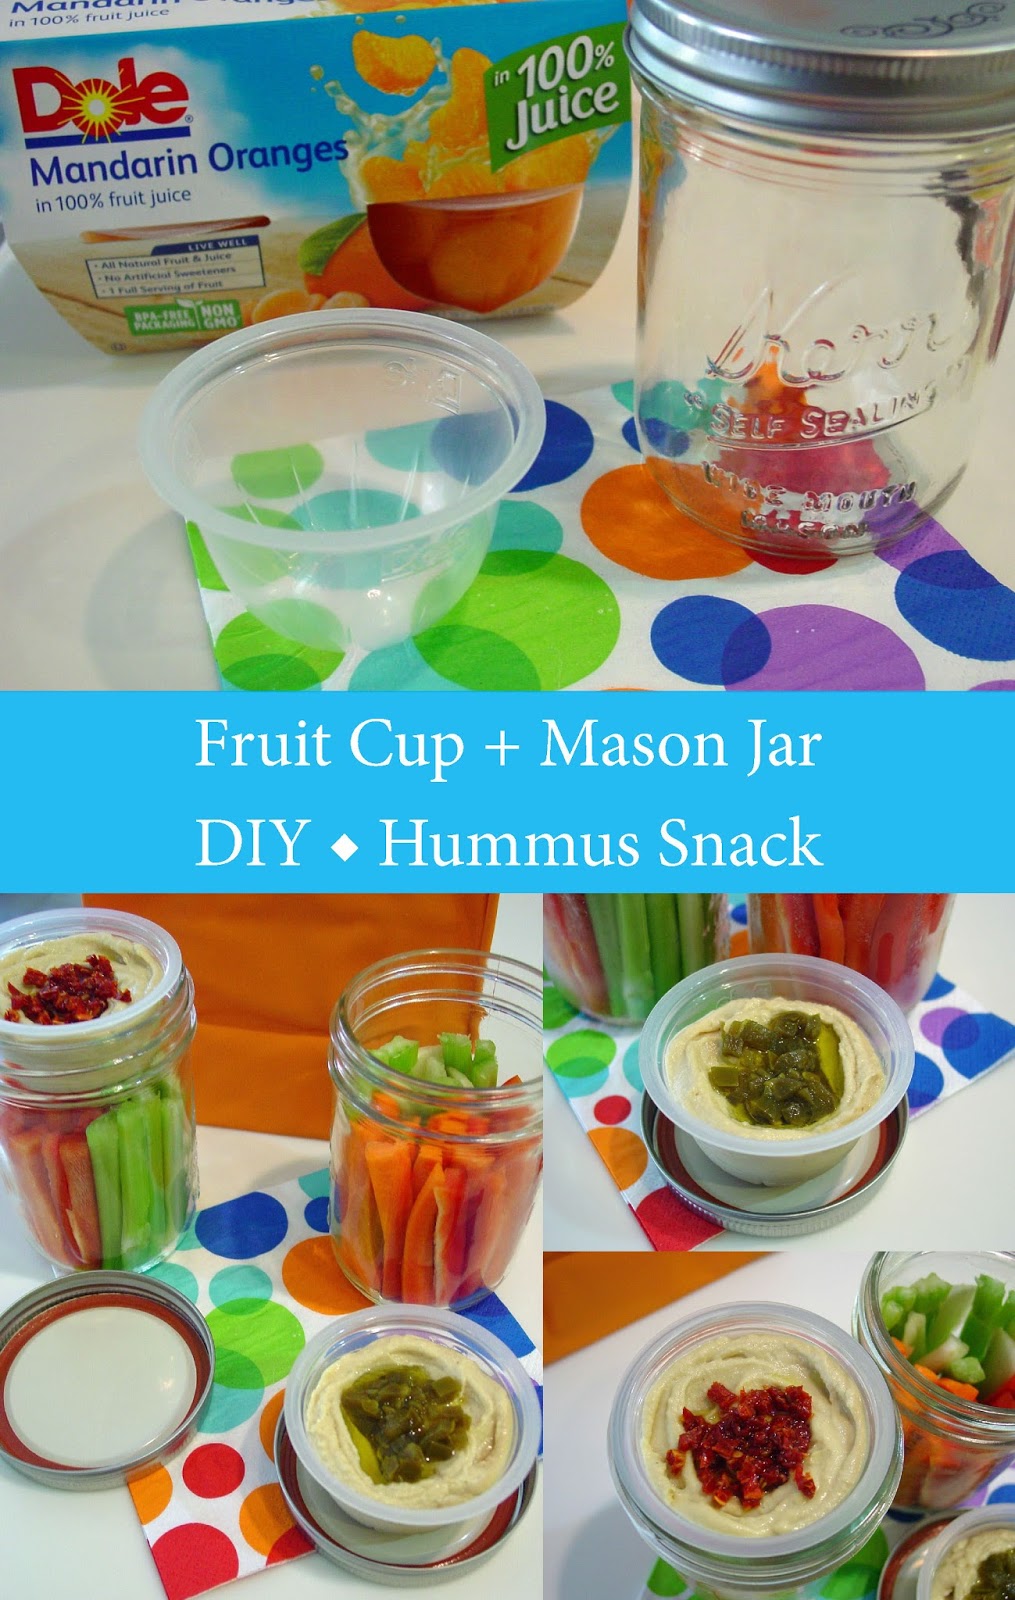
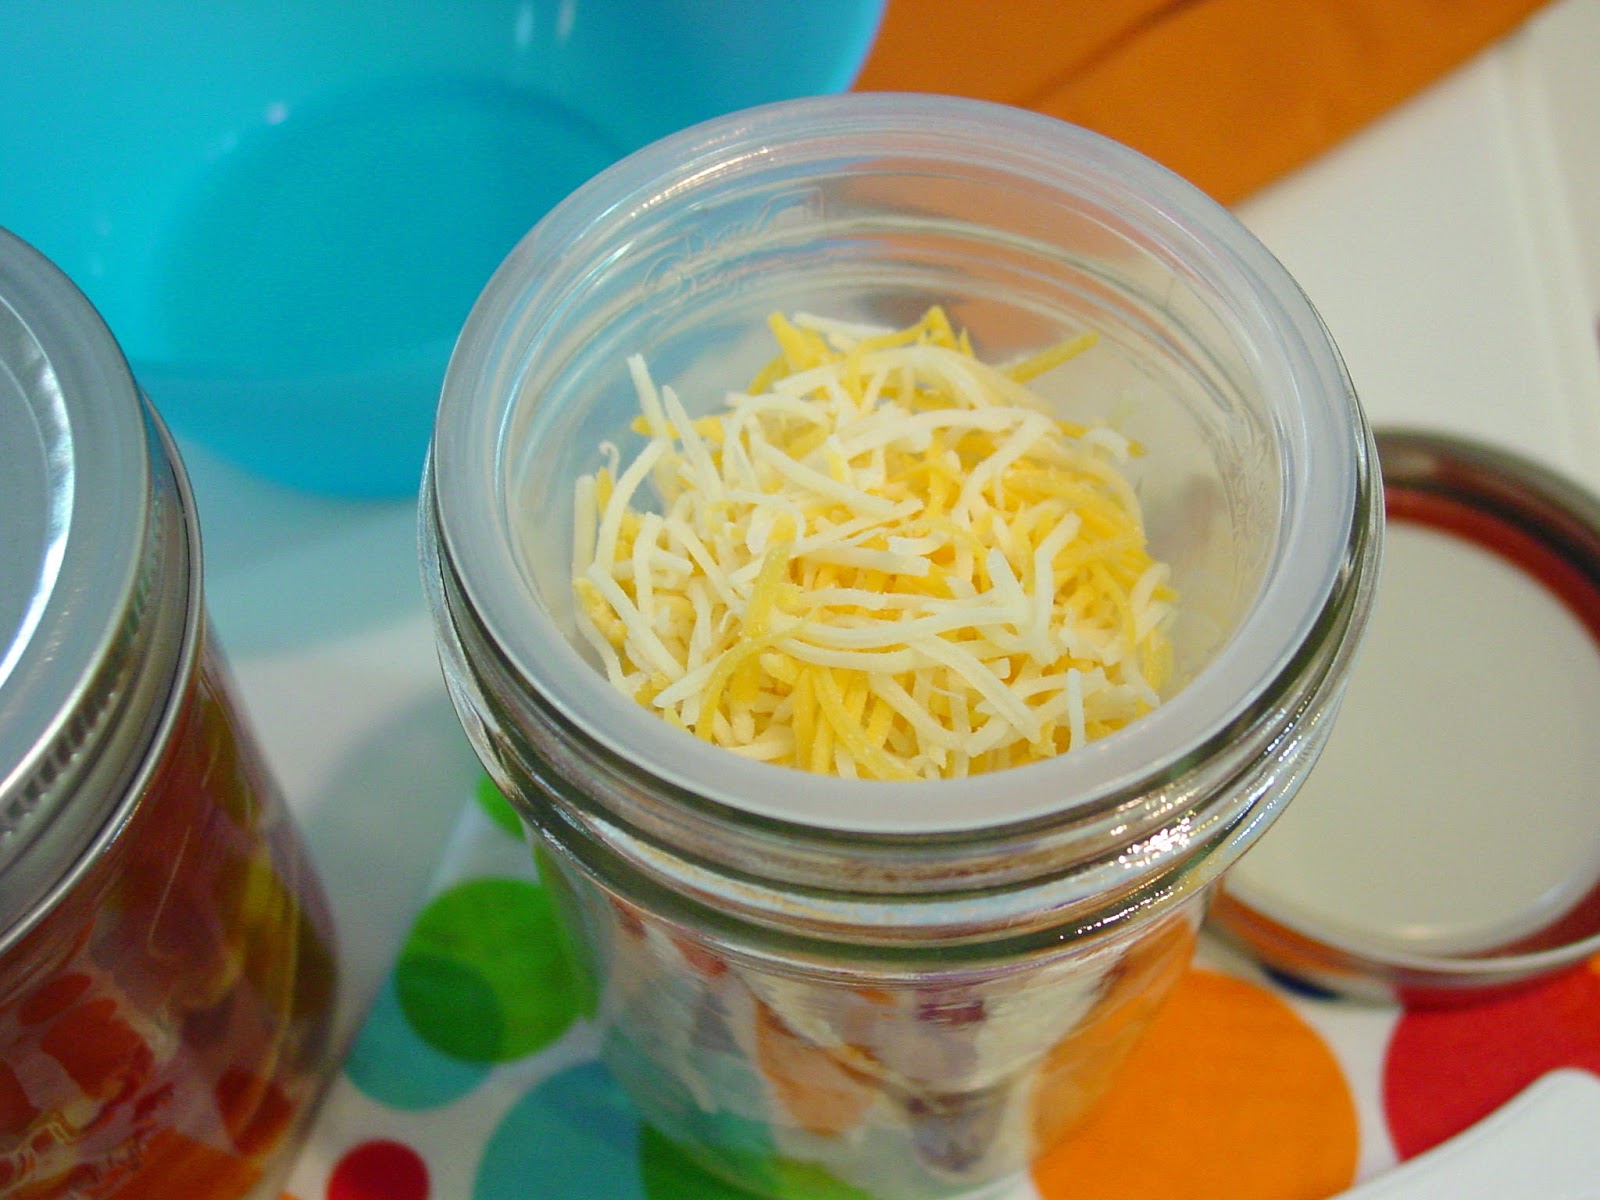
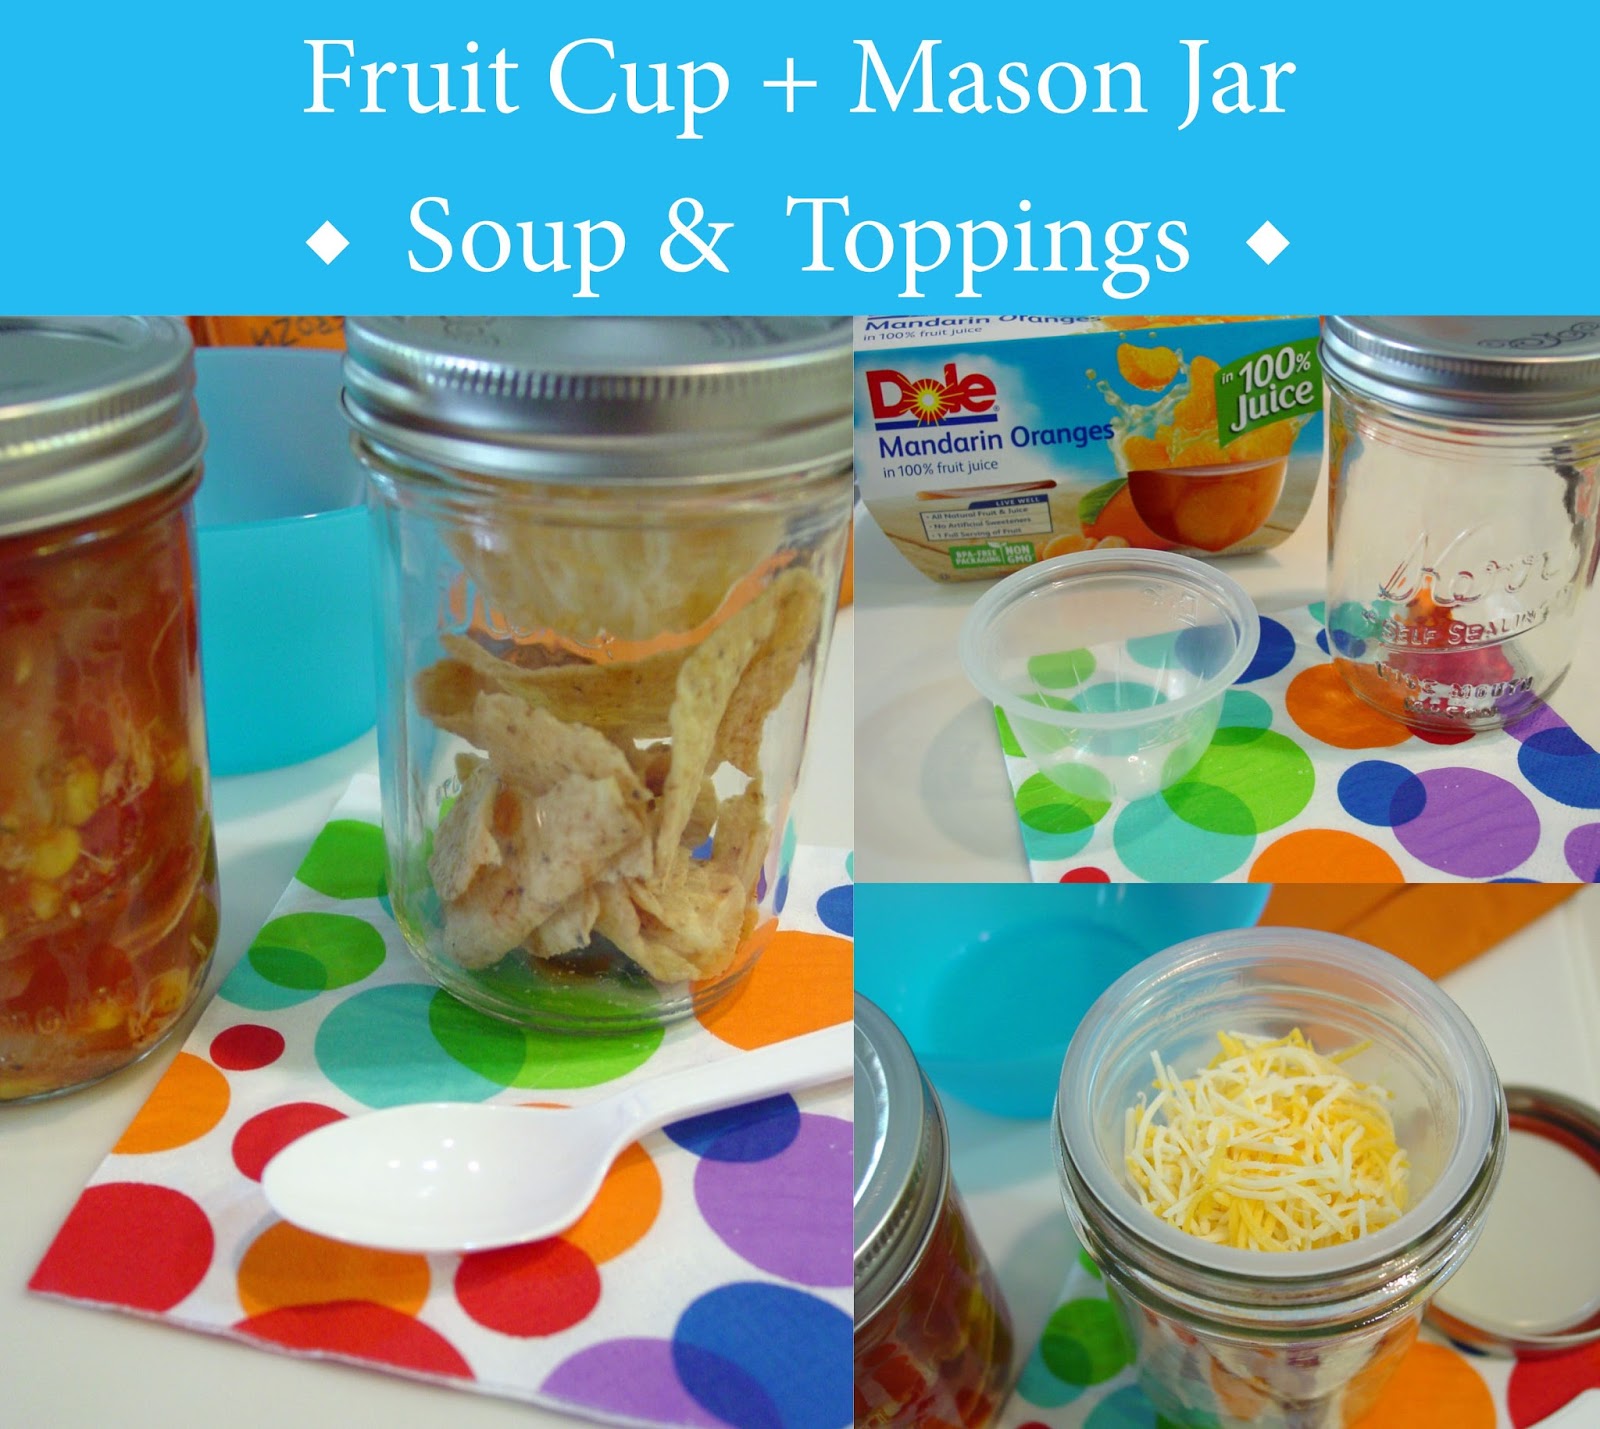
Look at this! Did you know that those little individual fruit cups fit perfectly in the top of a wide mouth mason jar. Well at least the Dole brand does. I suspect others do too. How brilliant is that?! Now you can keep all kinds of things neatly separated from others when you pack your lunch or snack. That little cup that would normally be thrown away can be recycled. Use it to keep dry ingredients separate from wet ingredients or visa versa. I did a lot of food prep using this idea this week. I made snacks and lunches. 


Perhaps my favorite snack was the Cheese, Fruit and Nut Jars I made. I got the idea after purchasing Sargentos Balanced Breaks. They are a great afternoon snack and so easy to make your self. You can use your favorite cheese, dried fruit and nuts. The fruit cup and a wide mouth half pint jar makes it easy to make many ahead of time. I made several with two different types of cheese. Everything including the nuts kept their original texture even after spending days in the refrigerator. Here is what I put in each jar:

1 oz. of cheese, cubed
2 Tbsp. dried fruit
2 Tbsp. mixed nuts 


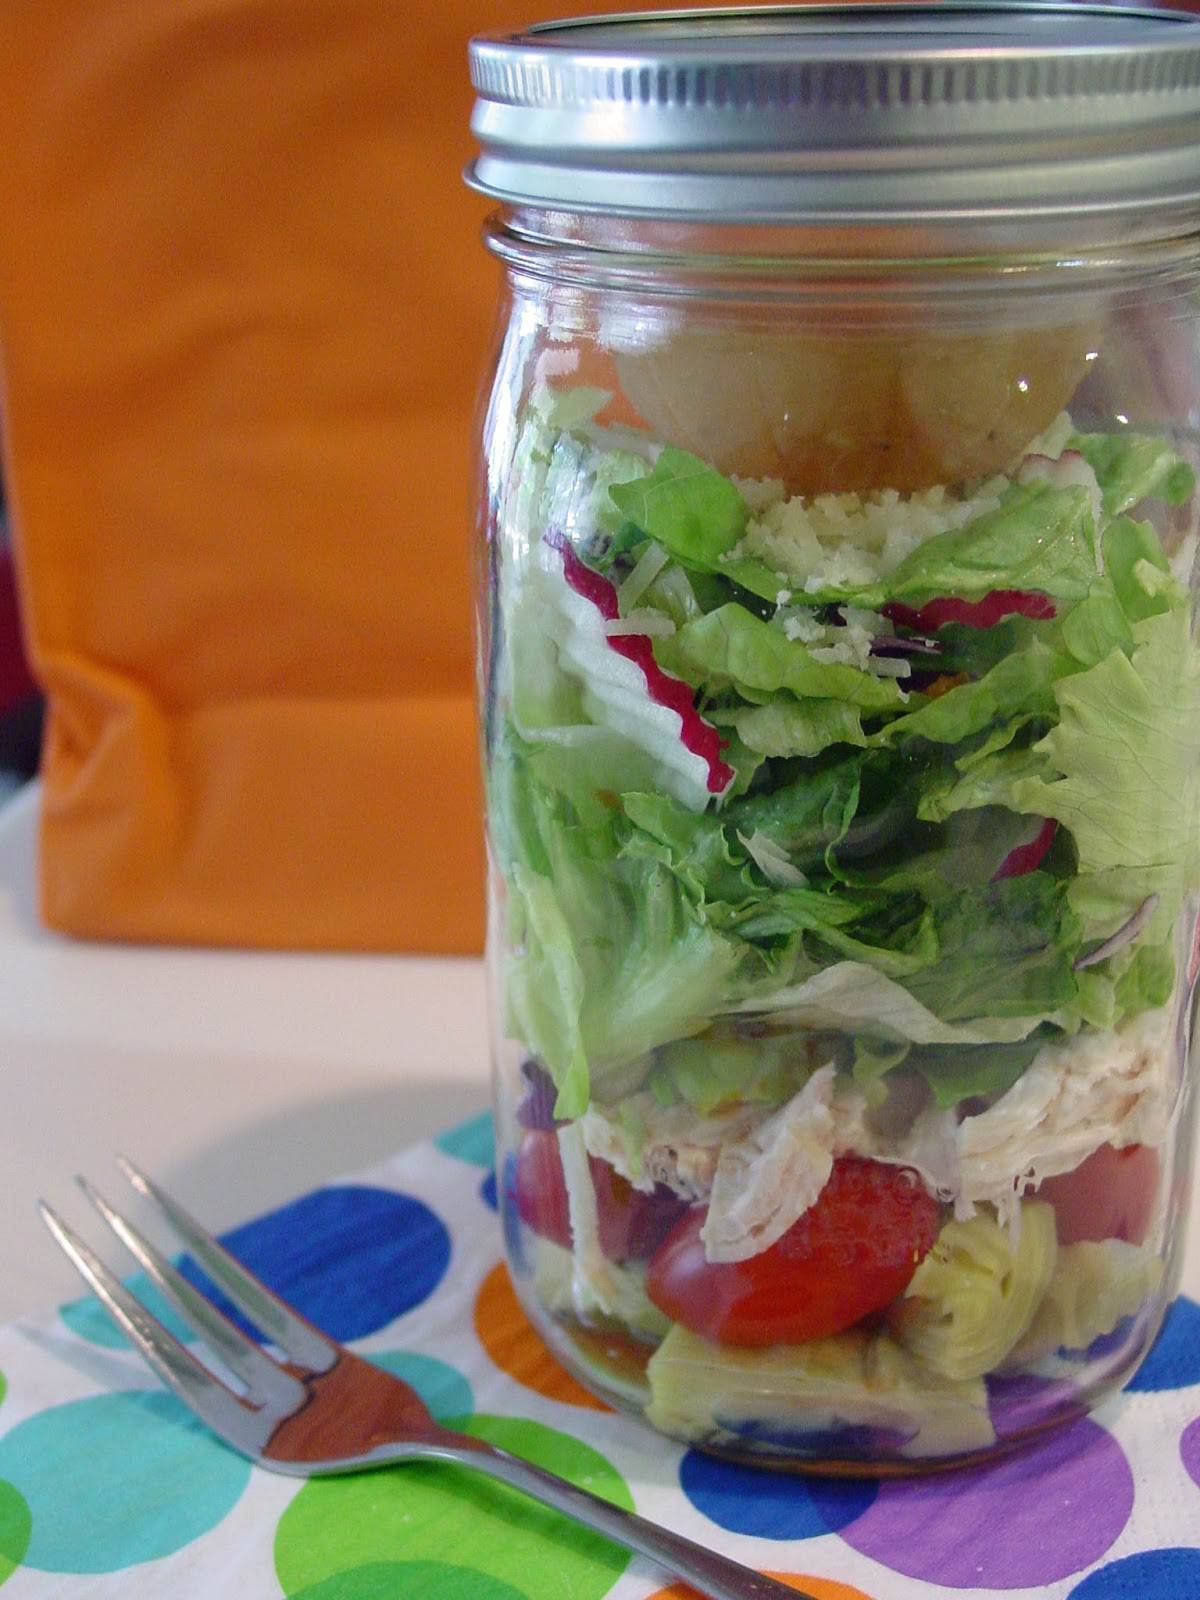
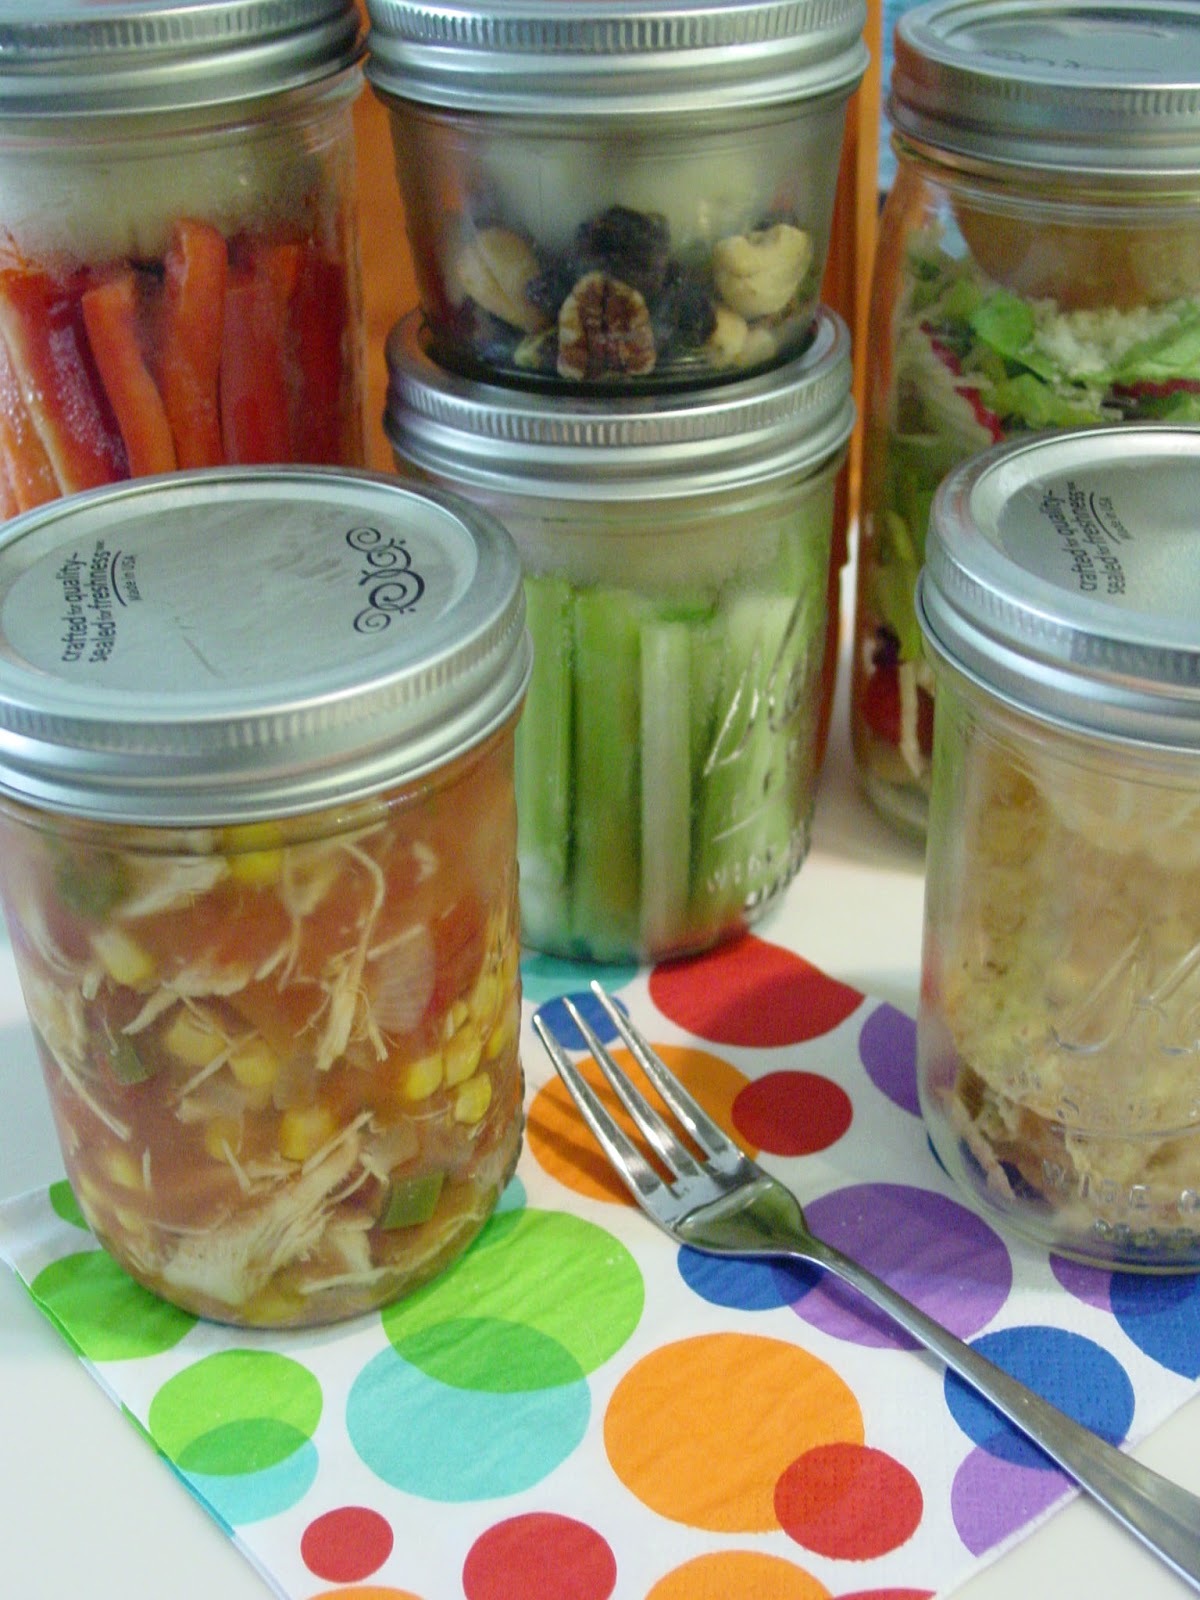
Everyone has heard of Mason Jar Salads by now. But with the fruit cup and a wide mouth quart size jar you can pack your salad with dressing or crunchy toppings separate until lunch. I made a few with artichokes, tomatoes, poached chicken, salad greens, Parmesan cheese and Italian dressing in the cup. 
It made a great light easy to carry lunch.


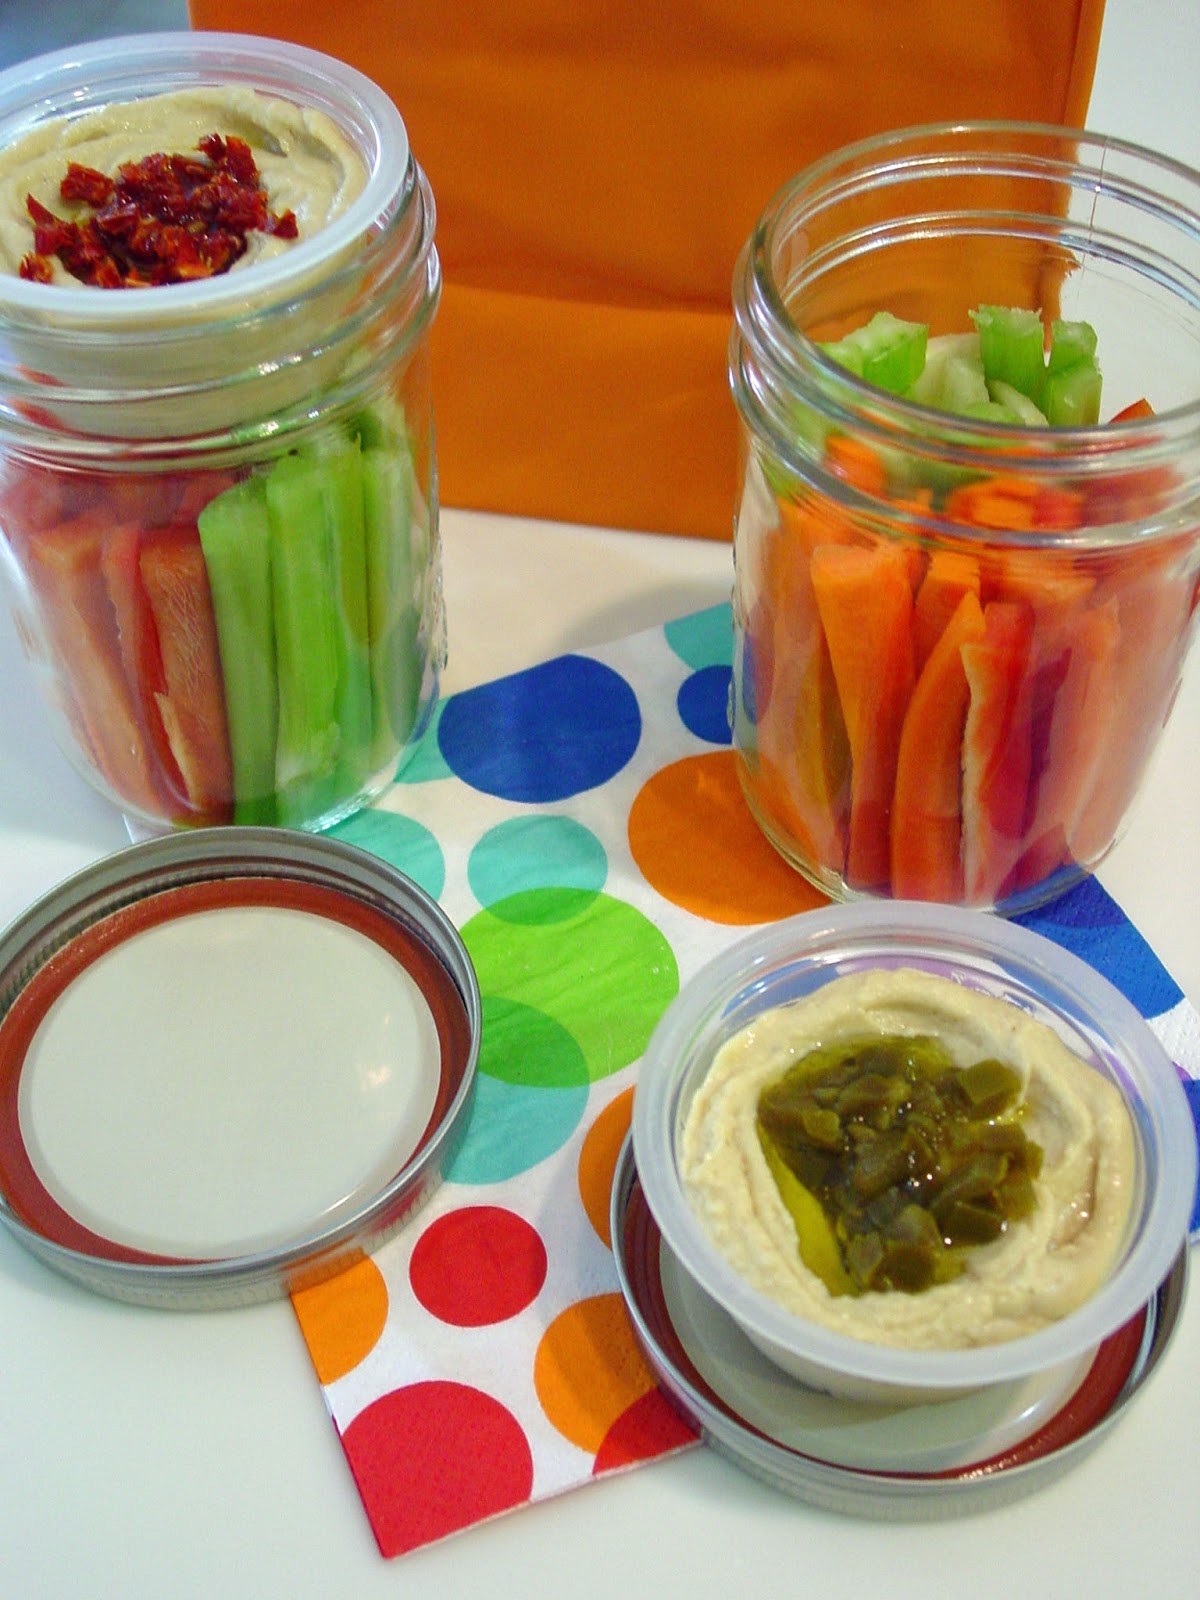
Another of my favorites was a Hummus and Veggies Snack Jar. I used a fruit cup and a wide mouth pint size jar. I cut up carrot, celery and red bell pepper into sticks. Then I put plain hummus in each fruit cup. Here is where I added variety to my snacks. I topped some with minced pickled jalapeno and some with minced sundried tomato then a drizzle of olive oil. You can use any selection of veggies and hummus. If prepping for a family everyone can have their favorite. You can buy store bought hummus or make your own.

Check out this link for more Hummus recipes.


Last but certainly not least I packed my Chicken Tortilla Soup with the cheese and tortilla chips. I used one fruit cup and two wide mouth pint size jars. I put the soup in one jar and the chips in another. I put the cheese in the fruit cup and placed it on top of the chip jar. Then I put both in the refrigerator. Again the chips kept their crunchy texture even after being in the frig for days. This meal prep idea is going to make life very easy.


Want the soup recipe follow the link below:


The possibilities for meal prep with these little fruit cups are endless! 
So get out there and eat more fruit.


Some other ideas not pictured here:

Make your own Fruit, Yogurt and Toppings

Keep spreads like Nutella, Peanut Butter or Almond Butter 
separate from your fruit, Crackers or Pretzel Rods

Keep Protein, Rice or Grains separate from your Salad 
so you can warm them before adding to your salad

Keep your Dips separate from your Chips

Or keep cold things like sour cream separate so you can warm your chili


Linking to:
I Thee Cook: Thursday Favorite Things Blog Hop
Tornadough Alli: Throwback Thursday Link Party
Love Bakes Good Cakes: Freedom Fridays with All My Bloggy Friends
Reasons To Skip The Housework: STH Link Party
Miz Helen's Country Cottage: Full Plate Thursday
Carole's Chatter: Food on Friday - Cheese

Stuffed Green Peppers

This recipe has been in my family for years. It dates back to our very first Panasonic microwave. My parents bought a large counter top model with auto sensor features. My Mom, dear sister and I even went to an instructional course on microwaving at the store where they bought it. I have forgotten most everything we learned that day. What I remember is that Dad did not go to microwave school. Whenever he had a question about using the microwave he would say, "I didn't go to microwave school". We all got a good laugh about that. We even reminded him on many occasions saying. "Oh yeah, that's right you didn't go to microwave school." Those were silly times. Anyway this is a recipe from the Panasonic cookbook that came with the microwave. It is so easy and very tasty. I usually use the microwave, but this time I used the oven and foil pans so I could freeze a few pans for future meals. This recipe is easy to assemble. The only difficult thing is deciding how long to cook them. Sometimes those peppers take a little longer than others. You will have to experiment a little. I am sure it will be different for everyone. It just depends on the peppers, your oven or microwave. You can cook them to your families taste; tender crisp peppers or nice and soft peppers. The good news is the beef filling is always light and fluffy no matter how long you cook them. The rice keeps it from being too dense. This really is a delicious comforting family meal. Add a side of corn or a salad and dinner is done. I hope you enjoy it as much as we have all these years.


Stuffed Green Peppers
Serves 4

Ingredients

1 lb ground beef
1/2 cup finely chopped onion
2 cans (8 oz ea) tomato sauce, divided
1/4 cup water 
3 Tbsp Parmesan cheese, divided
1 tsp salt
1/8 tsp pepper
1/2 cup instant white rice
4 medium green peppers (about 1 lb)

Directions

In medium glass bowl, combine ground beef, onion, 1 can tomato sauce, water, 1 tablespoon cheese, salt, pepper and rice. Cut peppers in half lengthwise; remove seeds and rinse. Spoon beef-rice filing into each half. Place in oblong dish. Top with remaining sauce and cheese. 

Microwave: Cover completely with plastic wrap. Heat on High for at least 15 minutes or as long as 25 minutes until the peppers are cooked to your liking. After heating, release plastic wrap.

Oven: Pre-heat oven to 350 degrees. Cover completely with foil. Bake for 1 hour. Remove foil and bake for 15 minutes or until the peppers are cooked to your liking.


Linking to:
Love Bakes Good Cakes: Freedom Fridays with All My Bloggy Friends
Reasons To Skip The Housework: STH Link Party

Thursday, September 10, 2015

Pancake Tacos

This recipe was inspired by brown sugar bacon. I watched a few videos on the Brown Sugar Bacon BLT where they made this bacon. When I tried the bacon for myself it screamed pancakes to me. It has a sweet, salty, nutty flavor sort of like pecans. I knew it would be just delicious with pancakes. Well since I am taco obsessed right now I decided to use the pancakes for taco shells. All that was left was deciding on the rest of the fillings. Since it is pancakes and bacon then it should be breakfast right? So eggs? Maybe cheese? But what kind of cheese? And I can't forget the salsa! I decided on scrambled eggs, goat cheese and an apple salsa. After all goat cheese is mild and creamy and it goes well with eggs and apple. The scrambled eggs and goat cheese were so creamy, a great contrast to the crunchy bacon and apple salsa. The salsa turned out to be the biggest surprise, such a delicious combination. The honey, lemon, green onion, and cilantro really makes the apple salsa. It is the perfect crunchy topping for these pancake tacos. I can't wait to try it on a salad one day too. It is great with the bacon. I know both would make a great salad. Now believe me when I say this is a filling breakfast. Huge in fact, so get really hungry before you make it.


Pancake Tacos
Serves 2

Ingredients

Shake and Pour Pancake Mix

Apple Salsa:
1 pink lady apple, chopped
Juice of one lemon
1 green onion, sliced
1 Tbsp. chopped cilantro
1 tsp. honey
Kosher salt, to taste
Black pepper, to taste
Red pepper flakes, to taste

8 slices low sodium center cut bacon
Brown Sugar
1 Tbsp. Butter, divided
4 eggs, beaten
2 oz. goat cheese, crumbled
Maple syrup, to taste

Directions

Preheat oven to 225 degrees.


Prepare pancake mix according to package directions and set aside.

Combine salsa ingredients and set aside.

Place bacon in a pan over medium heat. Cook until you start seeing a little brown color on the bacon (see first bacon photo), flip and sprinkle with brown sugar. Cook the second side until slightly brown, flip and sprinkle with brown sugar. Watch carefully the bacon will brown (or burn) fast now that it has brown sugar on it. Flip one more time to caramelize the sugar. Remove from pan and set on paper to drain.

In another non-stick pan, melt a little butter over medium heat. Pour enough pancake batter to make a 6" pancake. When you see bubbles on the surface of the pancake check to see if brown and flip. Cook until second side is brown. Place on a foil lined baking sheet and put in oven to keep warm. Repeat with remaining batter until you have four 6" pancakes.

In another non-stick pan, melt remaining butter over medium low heat. Add beaten eggs and season with salt and pepper. Gently stir eggs until soft curds form, continue to cook until eggs are set and remove from heat.

To assemble the tacos, start with a pancake, place two pieces of bacon inside, add a fourth of the eggs, top with crumbled goat cheese and apple salsa. Drizzle with a little bit of maple syrup.


after first flip with brown sugar sprinkle


with maple syrup drizzle

Linking to:
Miz Helen's Country Cottage: Full Plate Thursday
My Turn for Us: Freedom Fridays with All My Bloggy Friends
Tornadough Alli: Throwback Thursday Link Party
Reasons To Skip The Housework: STH Link Party
The Lazy Gastronome - Taco Tuesday Blog Hop

Thursday, September 3, 2015

Bloody Mary Hamburger Steaks

This recipe turned out to be a bright idea as well as a bright and savory meal. A while back my Mom made a recipe for Bloody Mary Stew with Egg Noodles and Olives. It was a delicious dish but what I was smitten with was the noodles. I loved the briny bite the olives added to the noodles. The stew was great but you could not taste the Bloody Mary flavors. So I began to think.... Can you hear Jeopardy music playing? I can. LOL! Anyway, back to thinking. I wondered what would be delicious with those noodles? What can I make with more Bloody Mary flavor. Then it occurred to me why not smother a hamburger steak with Bloody Mary Mix. Perfect! I was able to add the Bloody Mary flavors inside the burger then smother it in even more flavor. It was delicious with the noodles. Bright, saucy and tangy comfort food. My only regret is that I was a little timid with the spice. I thought anything spicy or with heat would intensify when cooked and it had time to reduce. It really didn't. So I would say this recipe as is would be family friendly. It is not spicy. But if you are looking for the spicy heat of a Bloody Mary bump up the hot sauce and horseradish. I am totally going to bring the heat next time I make it. I may even try adding a little vodka? I hope you will give it a try. I used a store bought Bloody Mary mix but you could totally use your favorite recipe as well. Don't forget to try the noodles too! You will love them. They are a delicious side for saucy meals like this and stew. So good!


Bloody Mary Hamburger Steaks
Makes 4 servings

Ingredients

16 oz lean ground beef
1/4 cup minced shallot or onion
1/4 cup minced celery
1 tsp. Worcestershire sauce
1 tsp. Horseradish
1 Tbsp. chili sauce
1 garlic clove, minced
Celery salt, to taste
Lemon pepper, to taste
1 Tbsp. olive oil
12 oz. Bloody Mary Mix
1 tsp. hot sauce, or to taste

Directions

In medium bowl, combine beef, onion, celery, Worcestershire sauce, horseradish, chili sauce, and garlic; form mixture into four equal patties, each about 3/4" thick. Season both sides with celery salt and lemon pepper.

Heat olive oil in medium nonstick skillet over medium heat 1 minute; add patties. Cook, turning once, 2-3 minutes on each side, until browned.

Add Bloody Mary Mix and hot sauce to skillet; reduce heat to low. Cook, 5 minutes, until patties are cooked through and sauce reduces. Serve over Egg Noodles with Olives.


Egg Noodles with Olives
Serves 4

Ingredients

4 cups dry egg noodles
2 tsp. olive oil
1/2 cup sliced green olives
4 ribs from the heart of celery with leaves, sliced
Kosher salt, to taste
Black pepper, to taste

Directions

Prepare egg noodles according to package directions in salted water. Drain and place in a serving bowl. Drizzle with olive oil. Add olives and celery, season with salt and black pepper to taste. Toss to combine. Serve as a side to Bloody Mary Hamburger Steak or stew.


Linking to:
Miz Helen's Country Cottage: Full Plate Thursday
Love Bake Good Cakes: Freedom Fridays with All My Bloggy Friends
Tornadough Alli: Throwback Thursday Link Party
Reasons To Skip The Housework: STH Link Party

Tuesday, September 1, 2015

Stuffed Zucchini Soup

I was inspired to make this pot of soup after seeing a lot of different stuffed zucchini recipes and videos. I have to admit they all sounded delicious, but I must have been feeling lazy because I had no desire to go to all that fuss. All I could think was the flavors would make a great soup. Boy was I right! Using the same ingredients of Italian sausage, zucchini, tomato and Parmesan as the baked dish you can make a deliciously easy soup. There is no pre-cooking the zucchini. No using a spoon to hollow it out. No stuffing and no waiting for it to bake. The soup is a chop and drop recipe. Place your chopping board near the pot and just chop, then add to the pot. So easy but so flavorful. All the flavor is in the turkey Italian sausage, pasta sauce and Parmesan. I love the body the pasta sauce gives this soup. It is just the perfect consistency not too thick and not too thin. I will definitely be making this one over and over again. I am just sad that zucchini season is nearing it's end. Time is running out. So hurry! Go make a pot of this soup right now before it's too late. You will be glad you did.


Stuffed Zucchini Soup
Serves 8

Ingredients

1 Tbsp. olive oil
1 lb. ground turkey Italian sausage
1 yellow onion, chopped
1 garlic clove, minced
3 zucchini, quartered and chopped
14.5 oz. can stewed tomatoes with celery
24 oz. jar traditional pasta sauce
4 cups unsalted chicken stock
1/4 tsp. black pepper
Dash of red pepper flakes
Handful of parsley, chopped
Shredded Parmesan cheese

Directions

Place a soup pot over medium high heat; add olive oil and sausage. Cook crumbling up the sausage until browned. Add onions and garlic cook into onion begins to get translucent. Add zucchini, tomatoes, pasta sauce, stock and season with peppers. Bring to a boil and reduce to a simmer. Cook covered for 20 to 25 minutes until zucchini are tender. Stir in parsley and serve garnished with Parmesan and more parsley.


Linking to:
Love Bakes Good Cakes: The Ultimate Soup Recipe List Linky
Dizzy Busy & Hungry: Wine'd Down Wednesday
Buns In My Oven: What's Cookin' Wednesday
Spatulas On Parade: Wonderful Wednesday
Miz Helen's Country Cottage: Full Plate Thursday
Carole's Chatter: Food on Friday - Soup
Love Bake Good Cakes: Freedom Fridays with All My Bloggy Friends
Tornadough Alli: Throwback Thursday Link Party
Reasons To Skip The Housework: STH Link Party

Related Posts Plugin for WordPress, Blogger...