Sunday, June 29, 2014

Peach Drop Biscuits

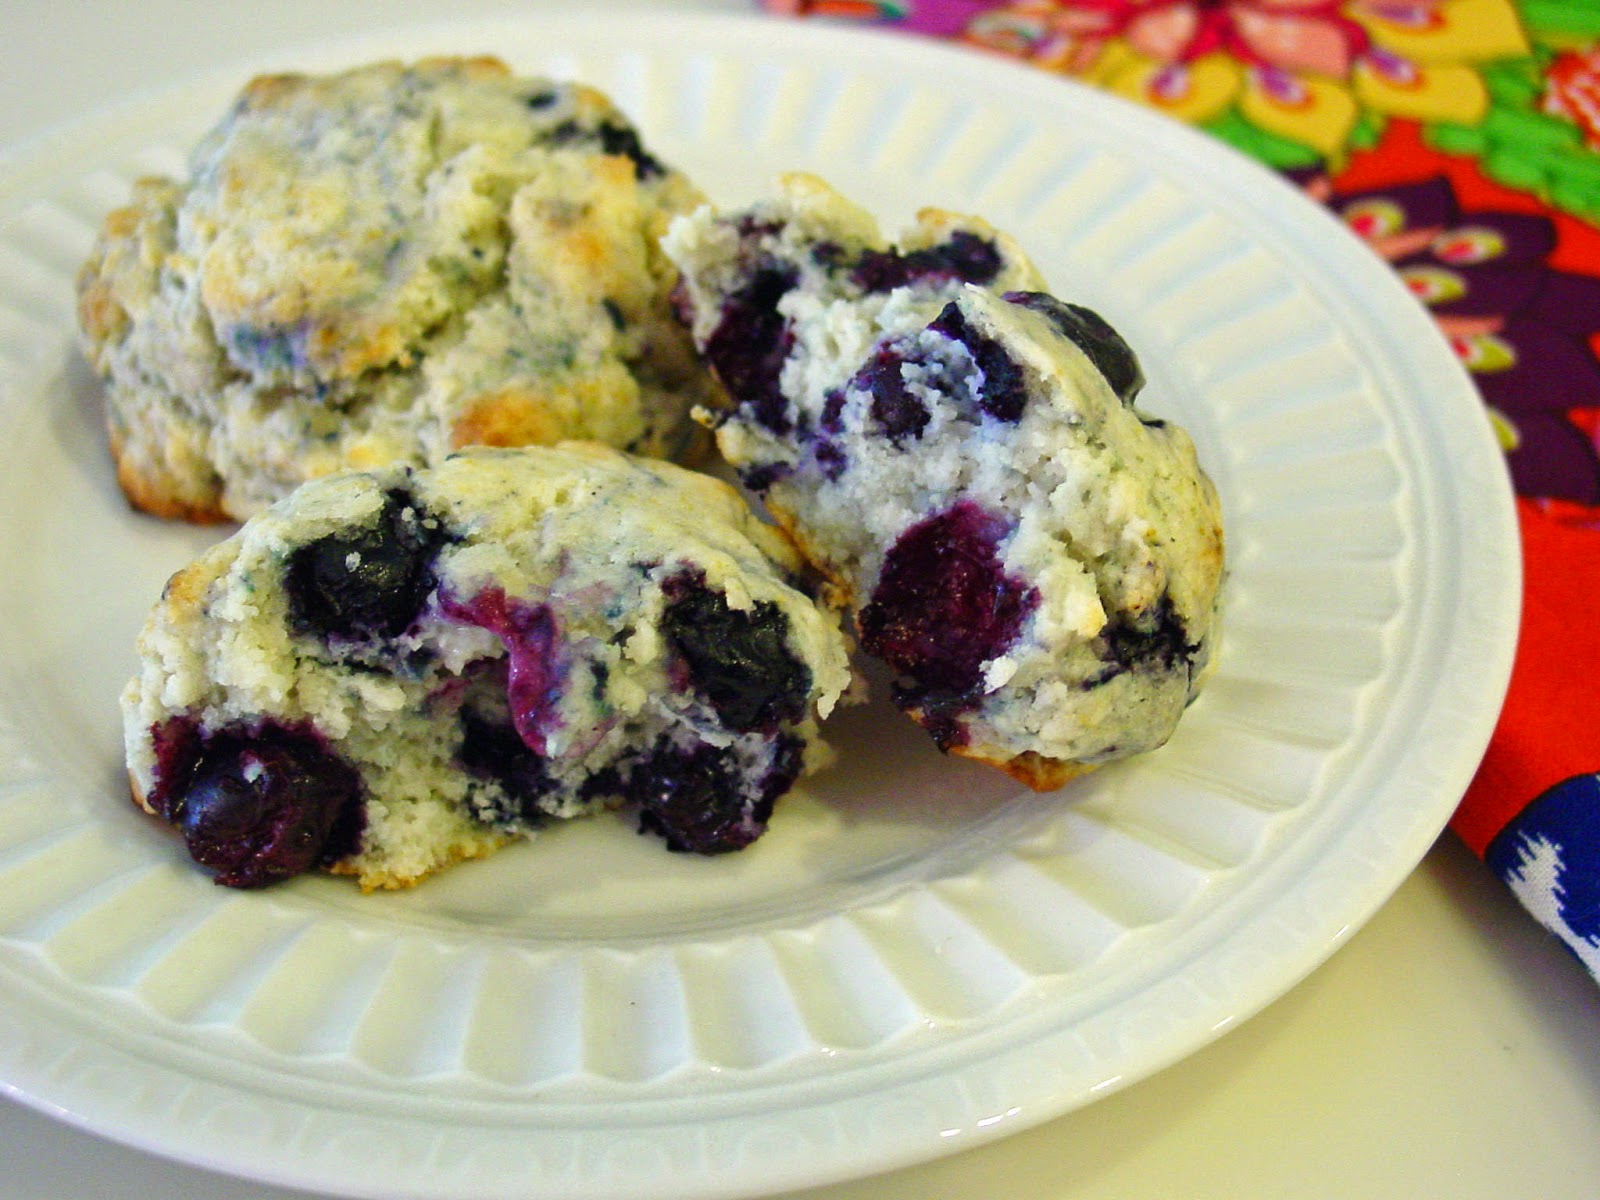
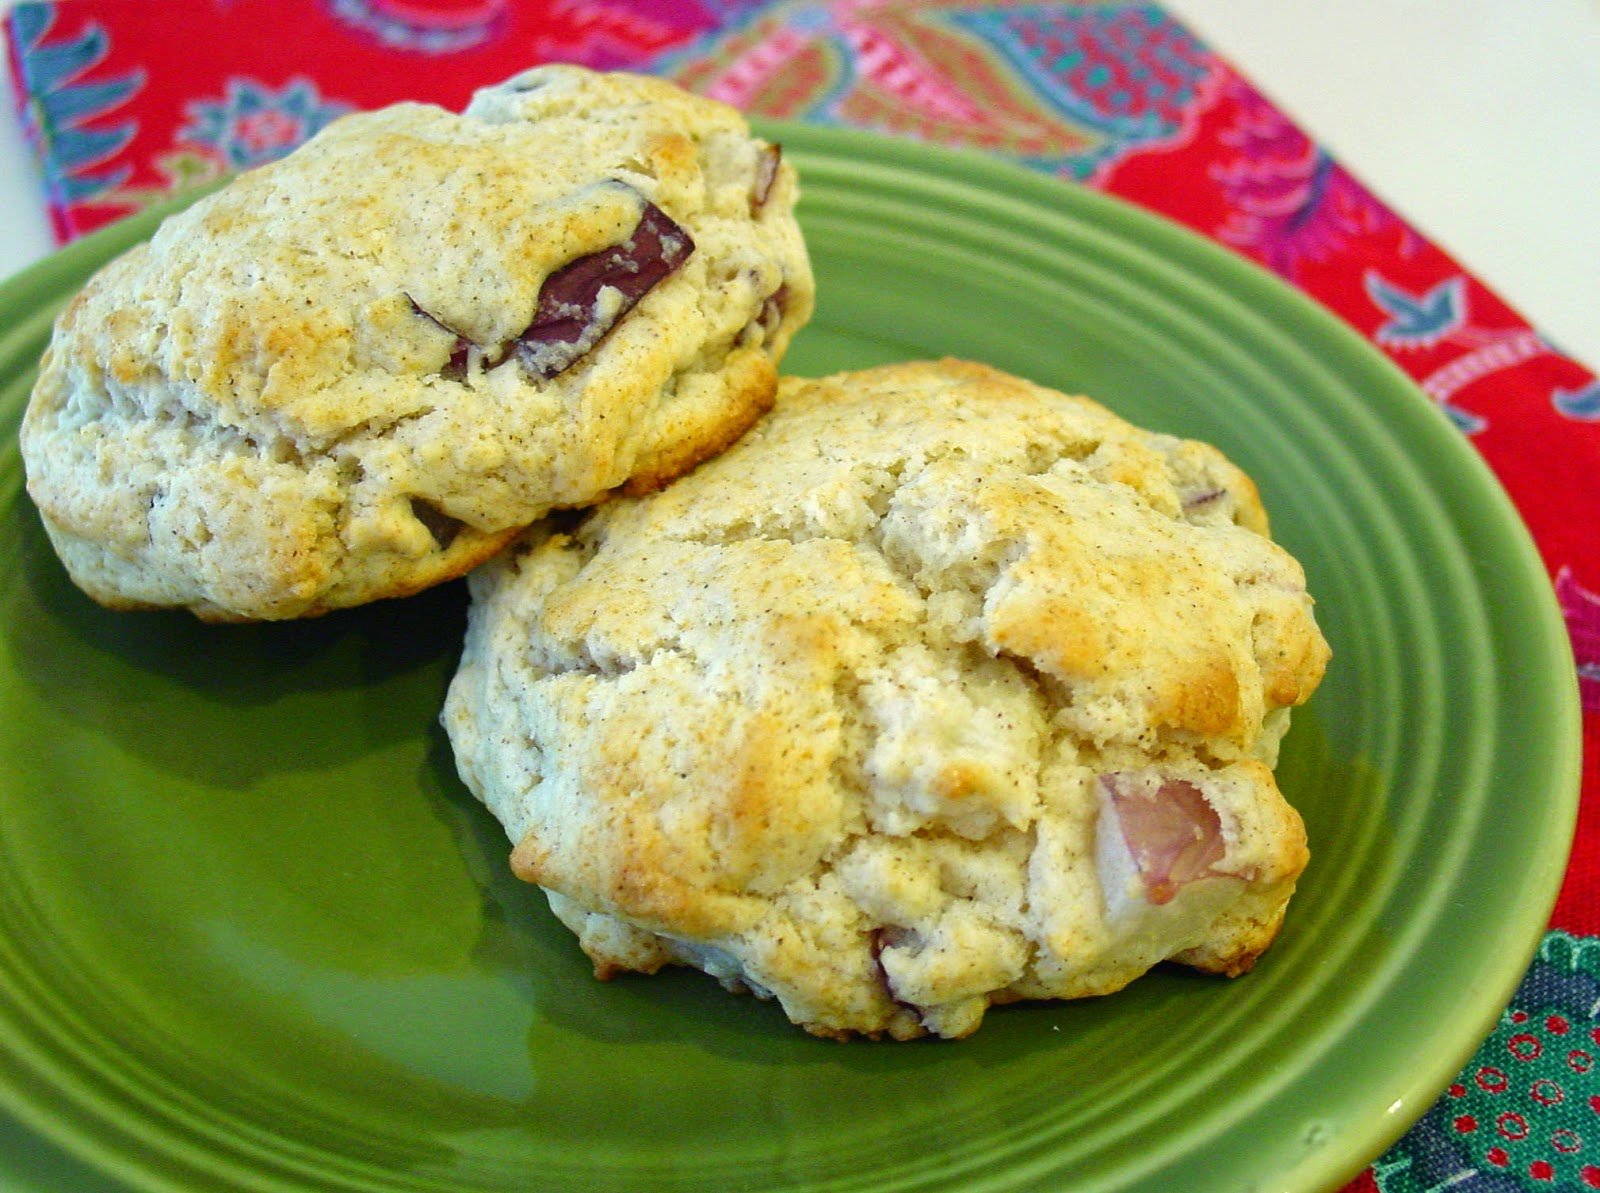
Drop Biscuit experiment number two, no wait? Number three? First there was Goat Cheese Drop Biscuits. Second Blueberry Drop Biscuits and now Peach Drop Biscuits. Of the three this has to be the most aromatic of them all. You can smell the ginger and cinnamon the minute the batter is stirred together. It really fills the house with warm baking aromas when it is in the oven. I loved the little specks of cinnamon in the biscuit, really pretty. The ginger and cinnamon were great with the peaches too. I used a firm under ripe white peach. White peaches were a better deal at the store. In my humble opinion it was a little sweeter than the yellow peaches I have had in the past.

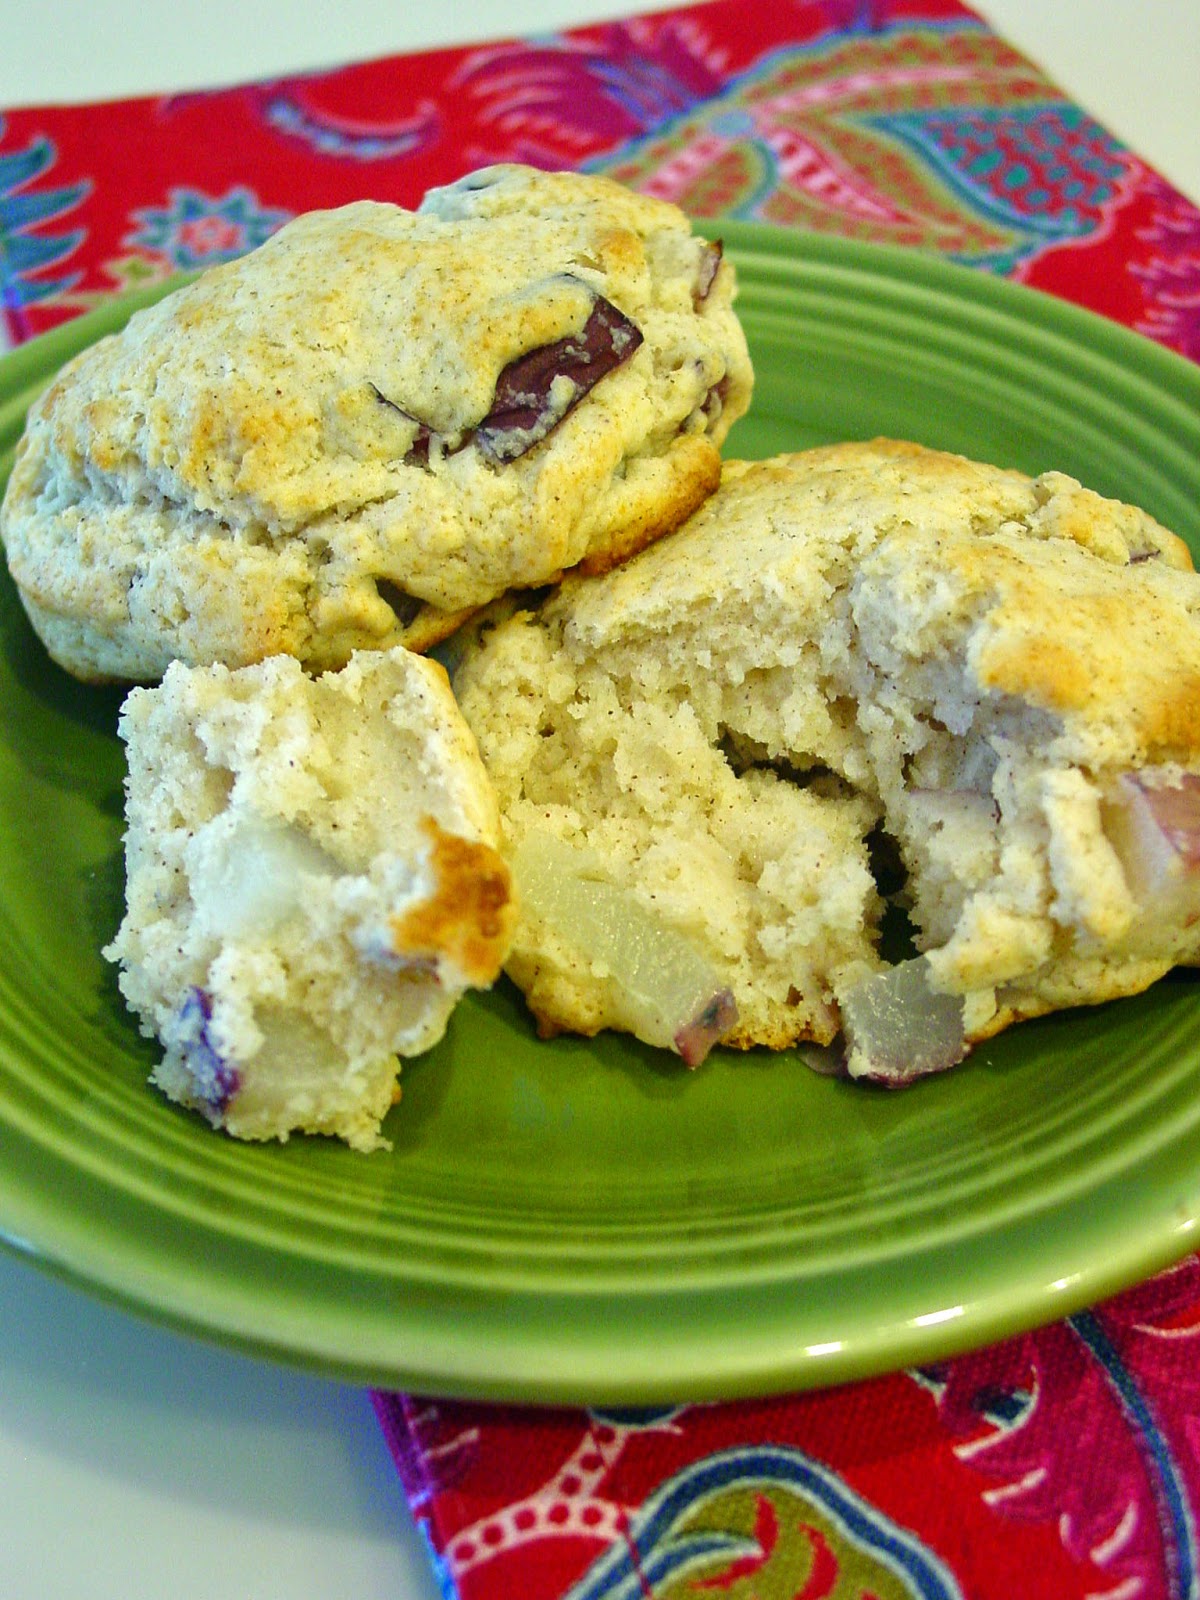
About now you must be wondering why does this girl keep making only two biscuits? Well...the simple answer is I will eat too many biscuits if I cook more! So if you are cooking for the family just double, triple or quadruple the recipe. I know the base recipe works that way. The only ingredient I would be careful with is the ginger. I do plan to make a large batch to share with my family soon. I will let you know about the ginger amount then. That being said there is not one ingredient in the recipe that over powers the others. It is really well balanced. The texture is a little more cake like than the other recipes, but that is not a bad thing. I really enjoyed this experiment too. I can't wait to try it with yellow peaches next. Ed Lester Farms has more and more peaches every time I visit. I see a peach pie in my future too.
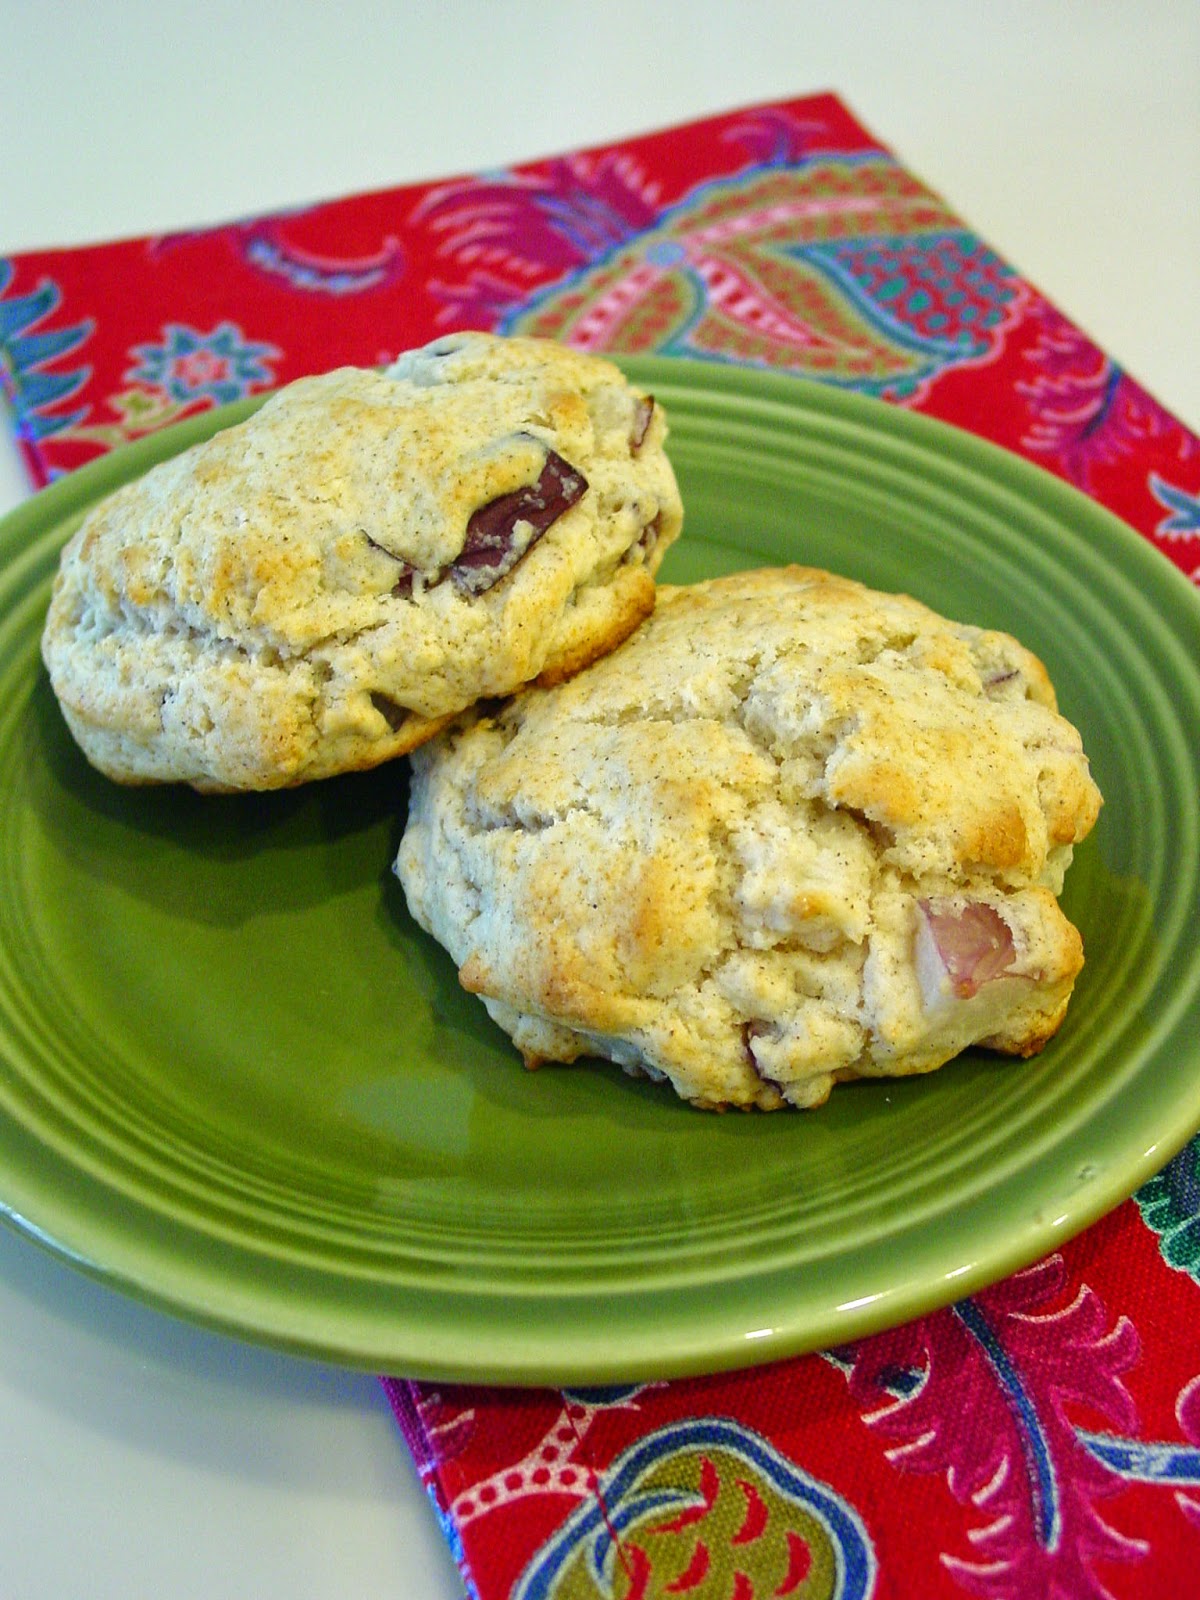


Peach Drop Biscuits
Makes 2 biscuits

Ingredients

1/2 tsp. fresh ginger, grated
2 Tbsp. + 1-1/2 tsp. milk (2% works fine)
4 tsp vegetable oil
1/2 cup all-purpose flour
3/4 tsp baking powder
1/4 tsp salt (table salt not kosher)
4 tsp. sugar
1/8 tsp. ground cinnamon
1/4 to 1/3 cup fresh peaches, diced (I used a white peach)

Directions

Preheat oven to 450 degrees.

Combine liquid ingredients, ginger, milk, oil and set aside. Whisk together flour, baking powder, salt, sugar and cinnamon. Add peaches and toss in the flour. Add oil and milk mixture. Stir until just combined. Drop large spoonfuls on ungreased baking sheet, forming 2 biscuits. Bake 10 to 12 minutes until golden brown.


Linking to:
The Chicken Chick: Clever Chicks Blog Hop
Stone Cottage Adventures: Tuesdays with a Twist
Creative K Kids: Tasty Tuesdays
Miz Helen's Country Cottage: Full Plate Thursday

Sunday, June 22, 2014

Blueberry Drop Biscuits for One

Now that I have the family Drop Biscuit recipe down pat. I can't help but experiment a little. This weekend I decided to sweeten the recipe up by adding a little sugar and some fruit. I used some blueberries from my freezer. It worked beautifully! These biscuits have just a hint of sweetness. They are not sweet like a blueberry muffin, they are more like a scone. Delicious just plain, no need for butter. They are great hot from the oven or at room temperature. I did notice that they browned a little faster. Any raised pieces of dough will get dark. So the second time I made them I patted down any peaks in the dough and that help them brown evenly. I am really excited about how this worked out. I can't wait to try some other fruits in this recipe. I have several flavor combinations in mind all ready. Be sure to come back for something "peachy" real soon.


Blueberry Drop Biscuits for One
Makes 2 biscuits

Ingredients

1/2 cup all-purpose flour
3/4 tsp baking powder
1/4 tsp salt (table salt not kosher)
4 tsp. sugar
1/4 cup fresh or frozen blueberries (do not thaw)
2 Tbsp. + 1-1/2 tsp. milk (2% works fine)
4 tsp vegetable oil

Directions

Preheat oven to 450 degrees.

Whisk together flour, baking powder, salt and sugar. Add blueberries and toss in the flour. Add oil and milk. Stir until just combined. Drop large spoonfuls on ungreased baking sheet, forming 2 biscuits. Pat down any peaks in the dough with your fingers. Bake 10 to 12 minutes until golden brown.


Linking to:
Ms. enPlace: See Ya in the Gumbo
Jam Hands: Recipe Sharing Monday
The Tumbleweed Contessa: What'd You Do This Weekend?

Nori Spicy Tuna Salad Wrap

I think I mentioned that I tried some other bloggers recipes recently. The first was a Nori Salad Wrap that Aylin at Glow Kitchen shared on her blog. Such a smart idea. I loved the salty sea flavor of the nori with the salad ingredients. But the best part was the drizzle of the soy and tahini. I LOVED IT! The sesame soy combo was so good. It made a great toasty and salty dressing for this wrap. I will definitely make this wrap again and again.

The second blogger recipe I tried was a Spicy Tuna Salad that Caroline shared on her blog Pickled Plum. I was looking for a a new protein for another Sushi Salad. This did not disappoint. I love her spicy twist on tuna salad. It really elevated plain canned tuna. It would be great in a sushi salad, a lettuce wrap, sandwich, stuffed into a tomato or just with crackers. I am definitely going to make another sushi salad soon with this as the star ingredient.

But first I was inspired to mash up these two great recipes into my own Nori Spicy Tuna Salad Wrap. I used some leftover grilled tuna from my Baja Beach Fish Tacos. I mixed it with mayo, Sriracha, sugar, rice vinegar and a touch of sesame oil for my filling. Then I wrapped it up with crisp veggies in a nori sheet. It was delicious! Spicy, salty, fresh, crunchy and a little messy. That last two bites of each roll was all over my fingers. It's okay, it is a finger licking good wrap. So no worries, just sit down with a stack of napkins.


Nori Spicy Tuna Salad Wrap
Serves 1

Ingredients

1 Tbsp. mayonnaise
1 to 2 tsp. Sriracha sauce, or to taste
1/2 tsp. sugar
Splash of rice vinegar
1 or 2 drops sesame oil
5 oz. canned light tuna or leftover grilled tuna
1 green onion, chopped fine
1 nori seaweed sheet
1 romaine lettuce leaf
Carrots, shredded
Cucumber, julienned

Directions

Mix mayo, sriracha, sugar, vinegar and sesame oil together in a small bowl. Add tuna and green onion stir to combine.

Place nori shiny side down on a flat surface. Place lettuce leaf on the bottom of the nori. Top with carrots, cucumber and tuna mixture. Roll up, cut in half and serve.


Linking to:
Ms. enPlace: See Ya in the Gumbo
Jam Hands: Recipe Sharing Monday
The Tumbleweed Contessa: What'd You Do This Weekend?
Carole's Chatter: Food on Fridays - Leftovers

Ground Beef Chili Rellenos Tacos

When I went to Ed Lester Farms this last time I got four pretty poblano peppers. I knew I wanted to make a new Chili Rellenos Taco recipe. This is perhaps the spiciest of all the Chili Rellenos Taco recipes I have shared with you. You have the heat of the poblano, the spices of the taco seasoning and the Rotel in the Cucumber Ranch Salsa. Dear sister and I commented on the heat level but just kept on munching. I think her exact words were, "the heat just keeps building". So you have been warned. I used cheddar for this taco because that was the norm in my house with taco meat. I really liked it with all the other flavors. This recipe made for a deliciously spicy taco night.


Ground Beef Chili Rellenos Tacos
Serves 4

Ingredients


4 poblano peppers
1 lb lean ground beef
1 packet Taco Seasoning
8 small flour tortillas
1/2 cup 2% cheddar cheese, shredded
1/2 cup Cucumber Ranch Salsa (click here for recipe)

Directions

To grill the poblanos: Pre-heat grill to medium-high heat for 10 minutes. Place poblanos on the grill. Grill for five minutes on each side until skins are charred. Remove poblanos and cover with plastic wrap. When poblanos are cool enough to touch, peel off the skin of the poblanos. Cut poblanos in half from stem to tip, remove seeds, stem and veins being careful not to split open the sides of the pepper.


To prepare the beef: Brown ground beef in a skillet over medium high heat. Add taco seasoning and water as directed on the package. Simmer until all water is absorbed. Turn off heat.

To assemble the tacos: Warm the tortillas on the grill or in the microwave for a few seconds. Place a poblano half on each tortilla. Spoon the seasoned beef over the chili, top with cheese and salsa.  


Friday, June 20, 2014

Cucumber Ranch Salsa

This is yet another recipe inspired by the WW recipe review board. At least two members posted reviews for Cucumber Salsa Salads. I tried both recipes and liked different things about each. One was cucumber heavy and used Rotel. One was heavy on fresh tomatoes but added onion, celery and cilantro. The is my version using my favorite ingredients from both. I loved the spice of the Rotel and the additional crunch from the celery and onions. I decided to use a more even balance of tomato to cucumber. And what would salsa be without cilantro? It is crunchy, fresh, bright and the ranch adds a mellow creaminess to the vinegar. I just love rice vinegar. It is mild and has just a hint of sweetness. This is great as a salsa but also makes a good side dish or salad. It is also great as a topping for salad, chicken, fish, shrimp or tacos. The Rotel is spicy so use mild it you don't like spicy foods. I use original Rotel and it is spicy but not painful. It has lingering heat. It was just perfect for dear sister and I. We enjoyed it on Ground Beef Chili Rellenos Tacos and as a side. I really enjoyed having this crunchy salsa in the refrigerator this week.


Cucumber Ranch Salsa
Makes about 8 cups

Ingredients

2 English cucumbers, chopped
2 tomatoes, chopped
1 Rotel tomatoes, drained
1/2 cup celery, diced
1/2 cup onion, diced
1 pkg dry Hidden Valley Ranch Dressing Mix
1/2 cup rice vinegar
3 - 4 stems cilantro, chopped

Directions

Mix dry dressing mix with rice vinegar, pour over veggies and let sit for at least 3 hours in refrigerator, stirring often. This keeps for many days and gets better as it sits.  


Linking to:
Ms. enPlace: See Ya in the Gumbo
Jam Hands: Recipe Sharing Monday
The Tumbleweed Contessa: What'd You Do This Weekend?
The Chicken Chick: Clever Chicks Blog Hop

Saturday, June 14, 2014

So what have I been doing?

I am still here! Still cooking, just not developing any new recipes lately. I have cooked some tried and true recipes and a few of other bloggers recipes. I finally worked my way through the haul of veggies from Ed Lester Farms. I smothered the cabbage with pork like we do for New Year's Day. I did cook it without salt. It was surprisingly delicious. My no-salt family member was very happy. The only thing I did different was eliminate salt, add one minced garlic clove, some celery seed and replaced Tony's with Extra Spicy Mrs. Dash. I enjoyed this one with or without salt. I did snap a few photos. Not my best work. I so need to photograph this dish properly in the new year.


Next I made a Turnip Stew without salt. I did add some carrots, new potatoes and mushrooms because I only had 3 lbs. of turnips. It was good but needed the lift of salt in my opinion. I did add a tablespoon of sherry vinegar which helped a lot but I was afraid to add too much and turn off the salt shakers in the family. This was a hit with my no-salt family member and the salt shakers. That is once they shower the stew with some salt. Sorry no photos.

I also did do some experimenting with a Thai Pork Spaghetti Squash. It was delicious. This one I made just for me and it was great leftover. I did not add additional salt but so many of the condiments in the recipe have sodium. I used my Pork Noodle Salad recipe and substituted spaghetti squash for the rice noodles. I took pictures for you but I want to play around with the dressing on the squash before I post the recipe.


Finally I made Peasant Soup with the leeks from Ed Lester Farms. Again because I love my family I tried cooking this soup without salt. This was a fail for me. It so needs salt. Low or no sodium soups have proved to be a stump-er for me. I am going to have to research for a solution. I guess it is because of the high water content in soup? If you have some helpful tips please share.

Now for what is next...First Father's Day! We have burgers and grilled corn on the menu for sure. I have a dessert surprise planned. But more on that later.

Second, I went back to Ed Lester Farms today. They were super busy and had even more produce to share. They also had a bubble machine going! I felt like a kid waiting in line to pay for my veggies. They also had an antique truck parked out front and lots of big farm equipment. This is a great family experience. A little something for everyone. I brought home heirloom tomatoes, green tomatoes, cucumbers, Italian snap beans, eggplant, poblano peppers, sweet purple peppers, corn, zucchini and squash. Not sure exactly what I will be creating this week. But I see a cucumber tomato salad and maybe a new Chili Relleno Taco in the near future. Who knows? Come back and see.

Sunday, June 8, 2014

California Roll Salad

I guess technically this could be considered a rice bowl or a salad. I just know it is delicious. I first saw this type of salad on the Weight Watchers recipe review board. I have seen many more recipes since then, everyone uniquely different. I have been making it my way, just for one a few years now. I have made it with both brown and white rice, both are great. I think my favorite part is the pickled ginger and cucumber. I just love that flavor combination. Just think of all the sushi combinations you could create into other salads. Switch the crab sticks for spicy tuna or salmon and you have another fresh exciting salad. This is a very fresh, cool meal for summer. I should know I have made two in the past two days. YUM! Time to make more rice.


California Roll Salad
Serves 1

Ingredients

1/2 cup pre-cooked or leftover rice
1 Tbsp. rice wine vinegar
1/2 tsp. sugar
1-1/2 tsp. low-sodium soy sauce
1/4 tsp wasabi powder
1-1/2 cups romaine lettuce, chopped
1 small carrot, cut into matchsticks
2-1/2" piece of English cucumber, cut into matchsticks
2 imitation crab sticks, sliced on the diagonal
1/2 medium avocado, sliced
1 Tbsp. pickled sliced ginger
2”x3” piece of toasted nori seaweed, julienned with scissors
1 tsp sesame seeds

Directions

Warm rice in the microwave for 1 minute. Mix vinegar and sugar together. Pour half of the vinegar and sugar mixture over rice. Stir to combine and fluff with a fork. Stir in soy sauce and wasabi powder to remaining vinegar mixture to make a dressing. Fill a salad bowl with lettuce, rice, carrots, cucumber, crab, avocado and ginger. Pour dressing over the top and garnish with nori and sesame seeds.


Linking to:
Jam Hands: Recipe Sharing Monday
The Tumbleweed Contessa: What'd You Do This Weekend?
Stone Cottage Adventures: Tuesdays with a Twist
Lori's Culinary Creations: Tickle My Tastebuds Tuesday
Dizzy Busy & Hungry: Wine'd Down Wednesday
Buns In My Oven: What's Cookin' Wednesday
Family Home and Life: Wow Us Wednesday
Carole's Chatter: Food on Fridays - Cucumber
Love Bakes Good Cakes: Freedom Fridays with All My Bloggy Friends
My Pinterventures: Summer Salads Party

Friday, June 6, 2014

Tip: An Easy Way to Peel Garlic

Recently I pinned a tip from Courtenay at The Creek Line House. She shared how easy it was to use two bowls stacked together to peel an entire head of garlic. You just shake the garlic in the two bowls and the cloves fall apart and most of the skins or peels fall off too. She also shared Martha Stewart's video showing the technique. Brilliant idea, but the problem I had was I did not think I could keep the two bowls stacked together. I could see me shaking the bowls with great enthusiasm and then one of the bowls would slip and I would shower myself and the floor with garlic and peels. NO! I can't try that. What I hate about peeling garlic is that those pesky peels go everywhere and stick to everything. 

Then it came to me, why wouldn't a pot with a lid work? I know I could hold that together long enough to get the job done. Well let me tell you it works! It totally works! I used a 2-quart saucepan. It was the perfect size and the lid was very secure. I shook it for 30 seconds of so. Then I picked out the cloves and removed any peels still hanging on. The best part the peels stayed in the pot long enough to carry them to the trash can and dispose of them. I love this trick! 


I am going to be embarrassed if you have all been peeling garlic this way for years. If you have don't tell me.


Place garlic in the pot. Place lid on top and shake for 30 seconds or more.


Separate cloves from peels.


Store peeled garlic in a container in the refrigerator,
until ready to use in your recipes.


Linking to:
Ms. enPlace: See You in the Gumbo
The Chicken Chick: Clever Chicks Blog Hop
Stone Cottage Adventures: Tuesdays with a Twist
Lori's Culinary Creations: Tickle My Tastebuds Tuesday
Buns In My Oven: What's Cookin' Wednesday
Love Bakes Good Cakes: Freedom Fridays with All My Bloggy Friends
Creative K Kids: Tasty Tuesdays

Pinto Beans

Pinto beans are magic color changing beans too! These speckled red and white beans lose their spots as they cook. It was not as dramatic as the blue lake snap beans, but interesting to watch none the less. So go to Ed Lester Farms for your magic beans. I am laughing about this because I consider myself a foodie and would have thought I knew or remembered this about pinto beans. I didn't though. I have always cooked pintos from a can or dry. This was the first time I bought them fresh. Mom, dear sister and I sat around the table shelling pintos. I used a recipe I made before but since I was sharing it with family I cooked them without salt. Personally this is one of those recipes I do miss the salt. But I thought a squeeze of lime when serving did the trick. That is something I have learned about no salt cooking. Citrus juice and vinegar can add the brightness no salt recipes are missing. This recipe was original for 2 lbs. of dry pinto beans. It used double of all other ingredients and made a huge pot of beans. A very delicious recipe from a First Place cookbook. I love adding the fresh ingredients of bell pepper, tomatoes, onion and cilantro at the end. They really add Mexican flare to these beans. If you want to use dry beans use one pound and follow the recipe below. You will however have to cook the beans much longer. The original recipe says about 5 hours. Trust me, it will be worth it. These beans are delicious as a soup, side or in other Mexican dishes. I made burrito bowls with rice, beans, poached chicken, salsa and cheese. My family enjoyed them with a spoon. Endless possibilities for these pinto beans. I just might make a double batch next time.


Pinto Beans
Makes about 3 quarts

Ingredients

2 lbs. fresh pinto beans, hulled and rinsed (5 lbs. in the shell)
5 quarts water
3 whole garlic cloves
1/2 large onion, coarsely chopped
1-1/2 tsp. chili powder
1 heaping Tbsp. Creole Seasoning (click here for no salt recipe)
1-1/2 tsp. salt (omit for no sodium diet)
1 bell pepper, diced
2 tomatoes, diced
1/2 large yellow onion, diced
1/2 bunch cilantro, rinsed and tied into a bundle
1 lime, cut into wedges (optional)

Directions

Mix first 8 ingredients in a large (I used a 10 qt.) pot, boil gently 1-1/2 hours. Taste for seasoning and adjust if necessary. Add bell pepper, tomatoes, remaining onion, and cilantro. Cook 1 more hour at low rolling boil or until beans are tender. Discard cilantro bundle and garlic cloves before serving. Serve with a squirt of lime (optional).


Linking to:
Ms. enPlace: See You in the Gumbo
Jam Hands: Recipe Sharing Monday
The Chicken Chick: Clever Chicks Blog Hop
The Tumbleweed Contessa: What'd You Do This Weekend?
Stone Cottage Adventures: Tuesdays with a Twist
Lori's Culinary Creations: Tickle My Tastebuds Tuesday
Buns In My Oven: What's Cookin' Wednesday
Love Bakes Good Cakes: Freedom Fridays with All My Bloggy Friends

Green Beans in Garlic Black Bean Sauce

These are not just any green beans, these are Italian snap beans. They are large flat beans that I brought home from Ed Lester Farms. I snapped the stems off and blanched them, at that point they really made a great snack. I would love to try them in a veggie dip next time. This week I used them in an Oriental style stir-fry. I have had a similar green bean dish on a Chinese buffet. So I wanted to try to make something similar. I was so thrilled with the way this recipe turned out. I absolutely love the savory sausage with the green beans. Dear sister loved it too. I will definitely try it again with other varieties of green beans too. I really enjoyed the flavor of the black bean sauce. It was salty and savory too. But be careful with this ingredient, it can be really salty if you use to much. I can't wait to try it in other recipes. I just may have to go back to the farm again this week to get more beans.


Green Beans in Garlic Black Bean Sauce
Serves 2

Ingredients

1-1/2 lbs. Italian green beans, stems removed
1 tsp. canola oil
1 tsp. sesame oil
5 oz. reduced fat breakfast sausage
1 large clove garlic, minced
1/2" piece of ginger finely minced
3 green onions, sliced white parts separated from green parts
1 tablespoon black bean sauce
1 tsp. garlic chili paste
1 tsp. low sodium soy sauce

Directions

Bring a large pot of water to boil. Add green beans and blanch for 2 minutes. Remove and place in ice water to stop cooking. Drain and set aside.

Place a wok over medium high heat, add the canola and sesame oil. Add the sausage, stir-fry breaking up the sausage until it is fully cooked. Add the garlic, ginger and the white part of the green onions. Stir-fry until fragrant, and then add the green beans.  Stir-fry a minute longer, then add the black bean sauce, garlic chili paste and soy sauce. Continue to stir-fry until well combined and beans are warm. Serve garnished with the sliced green onion tops.


Linking to:
Ms. enPlace: See You in the Gumbo
Jam Hands: Recipe Sharing Monday
Stone Cottage Adventures: Tuesdays with a Twist
Lori's Culinary Creations: Tickle My Tastebuds Tuesday
Family Home and Life: Wow Us Wednesday

Thursday, June 5, 2014

Three Bean Salad

Here is the first of many posts to come on what I have cooked with the fresh veggies from Ed Lester Farms. The first thing I did was roast the bunch of beets we brought home. Then I washed and put away all the veggies. I removed the greens from the beets and turnips; then chopped, blanched and froze them for a future Gumbo Vert. The snap beans were up next.

I bought a large handful maybe a large grab would be a better description of each snap bean they had to offer. They had green, yellow or wax, and blue lake snap beans. The blue lake were almost purple. I thought they would make a beautiful three bean salad. But guess what those blue beans turn green when you cook them! I did not know that. I guess I learned something new this week. They did however make a delicious salad. I have been making this recipe for years with can beans. It is one of Dad's favorite salads. I made this one sans (without) salt. I did not miss it at all. It was so good! I loved the fresh beans too. I blanched them before pouring the hot dressing over them so they had a great texture. Just a little softer than tender crisp. I will definitely make this salad from fresh snap beans again.


Oh! I almost forgot, dear sister bought some creole onions. I had never heard of such a thing. They look like little red onions maybe 2" or 2-1/2" in diameter. They were the perfect size for this salad. I normally use half of a red onion. Creole onions taste spicy not sweet. They wilted in the hot dressing and were just delicious. I really could not tell a difference between the creole onion and red onion. However I really loved there small size.


Three Bean Salad
Makes 12 to 14 servings 

Ingredients

1-1/2 to 2 lbs. fresh green, yellow and blue lake snap beans, trimmed
1 cup apple cider
1 creole onion, sliced in half moons (or half a red onion)
3/4 cup sugar (or Splenda)
1/2 cup canola oil
2 garlic gloves, minced
1/2 teaspoon salt, or to taste (omit for low sodium diet)
1/2 tsp. Cajun seasoning (click here for a no-salt recipe)
Freshly ground black pepper
2 Tbsp. flat-leaf parsley, minced

Directions

Bring a large pot of water to boil. Add green beans and blanch for 5 minutes. Remove and place in ice water to stop cooking. Drain and set aside.

In a large bowl, combine the beans and the onion. In a small saucepan, stir the sugar (or Splenda), vinegar, oil, garlic and salt together and then bring to a simmer. Pour the hot liquid over the beans. Season with salt (if using), pepper and parsley. Marinate the beans at room temperature for 1 hour, tossing several times. Refrigerate. Serve cold or at room temp. This keeps well in refrigerator.

Notes: This recipe is also great using canned beans. Try using one can each green beans, wax beans, kidney beans and/or garbanzo beans. I use 15 oz. cans drained.


Linking to:
The Chicken Chick: Clever Chicks Blog Hop
The Tumbleweed Contessa: What'd You Do This Weekend?
Stone Cottage Adventures: Tuesdays with a Twist
Lori's Culinary Creations: Tickle My Tastebuds Tuesday
Family Home and Life: Wow Us Wednesday

Monday, June 2, 2014

Ed Lester Farms

Saturday Mom, dear sister and I went to Ed Lester Farms in Coushatta, LA. Last year I discovered them on the very last day they were open for the summer. So this year I have been patiently waiting and watching their website for when their crops come in and they open. It was dear sister's first visit. She was so impressed. It is hard not to be. Everyone is so nice and helpful. It is such a beautiful setting under a huge old oak tree. Sister loved the music they play as you shop. They have benches and rockers to sit in if you need to rest. They really do everything they can to make your shopping with them comfortable. We bought more than we could handle, I think. Three kinds of green beans, pinto beans, leeks, new potatoes, turnips, beets, cabbage, creole onions, peaches, and cucumbers. Have a look at some of the photos I took with dear sister's phone and check back later for what I did with all the great produce.


See these posts for more about Ed Lester Farms 
and recipes to use all those beautiful veggies.

Related Posts Plugin for WordPress, Blogger...